
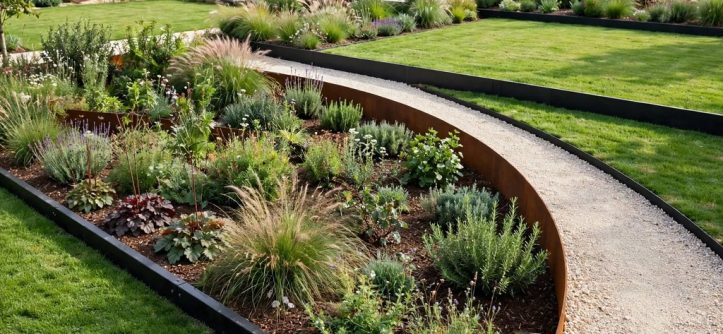
Metal garden edging creates clean borders and holds soil and mulch in place. Gardeners choose metal strips for strength, slim profiles, and long service in varied garden layouts. Additionally, metal suits straight lines, gentle arcs, and bold contemporary planting schemes.
This guide explains materials, profiles, design choices, and installation methods in clear practical steps. It also covers cutting, shaping, drainage, rust care, and simple seasonal maintenance. Consequently, readers can plan a border with confidence and avoid common installation mistakes.
Metal edging works around lawns, flower beds, vegetable plots, trees, and paths. It separates different surfaces while keeping the garden easy to mow and tidy. Furthermore, thoughtful height and finish choices help the border blend into the wider landscape.
Why Gardeners Choose Metal Garden Edging
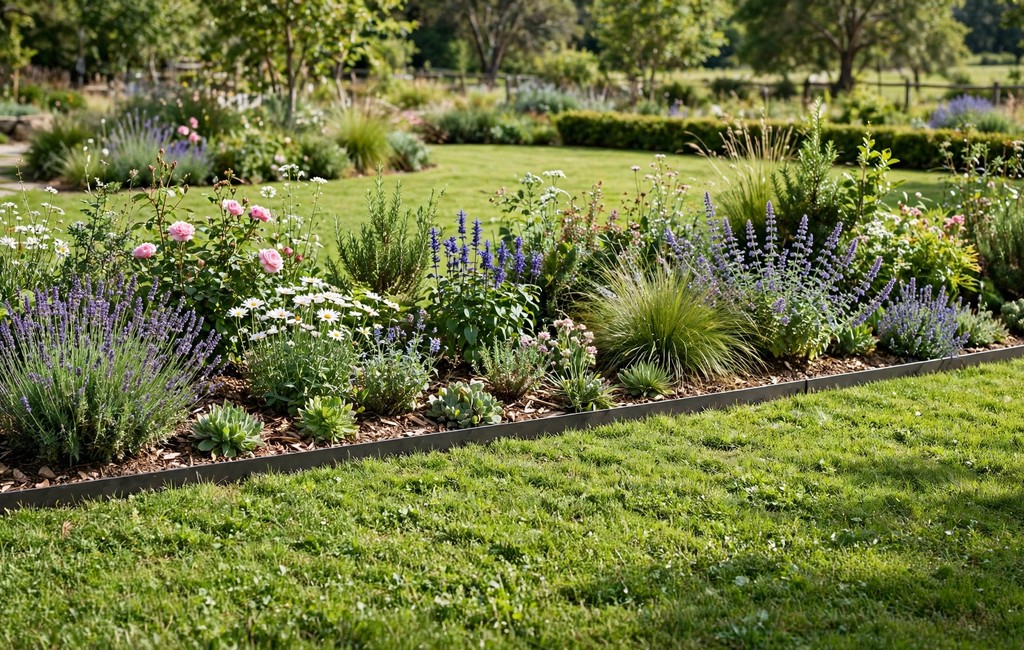
Metal borders define planting areas with a slim line that highlights plants beautifully. Gardeners value this subtle effect in formal layouts and relaxed cottage style gardens alike. Additionally, a narrow profile leaves more room for roots, mulch, and nearby planting.
Strong metal resists mower bumps, foot traffic, and shifting soil better than many softer border materials. It holds its shape through wet spells, dry spells, and repeated seasonal change. Meanwhile, firm anchoring keeps long runs straight and prevents gradual drift into lawns or paths.
Metal also simplifies routine garden care in practical ways. Mowers can run along a firm edge without scalping nearby plants or scattering mulch. Similarly, trimmers can follow the line cleanly when gardeners keep the exposed lip low and even.
A tidy edge improves drainage patterns around beds by separating soil from lawn and path surfaces. Water flows along clear boundaries instead of washing mulch across grass or paving. Therefore, beds stay neater after rain and need less frequent topping up.
Metal borders adapt well to changing garden plans over time. Gardeners can extend runs, reshape arcs, or move sections when planting schemes evolve. Furthermore, reusable strips reduce waste and support gradual garden improvement rather than complete replacement.
Visual order matters in small gardens just as much as in large landscapes. A consistent metal line connects separate beds into one coherent design. In addition, matching finishes across beds, trees, and paths strengthen the overall garden character.
Materials That Shape Metal Edging
Steel offers strength, rigidity, and a clean profile for long straight borders and sweeping arcs. Gardeners often choose thicker steel where mower contact, foot traffic, or soil pressure demands extra stability. Additionally, coated steel resists moisture and keeps its appearance through many seasons.
Galvanized steel carries a protective zinc layer that shields the surface from moisture and soil contact. This coating helps ordinary steel perform well in damp beds and shaded borders. Meanwhile, gardeners should protect cut ends because exposed steel needs sealing after cutting.
Stainless steel provides a bright modern finish and strong resistance to corrosion in damp conditions. It suits contemporary gardens, courtyards, and borders near water features. Furthermore, its smooth surface cleans easily and keeps a polished look with minimal effort.
Aluminum weighs less than steel and bends readily around arcs, circles, and organic bed shapes. Gardeners appreciate its easy handling during installation and adjustment. Similarly, aluminum resists corrosion naturally, which suits damp climates and irrigated planting areas.
Corten And Powder Coated Metal Garden Edging
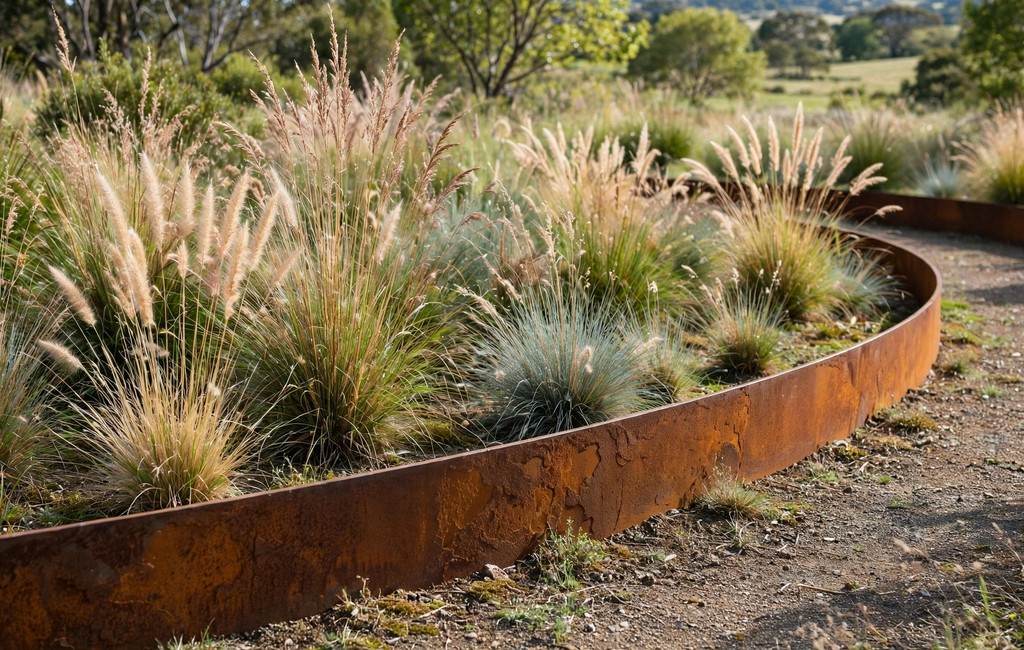
Corten steel develops a warm weathered patina that deepens gradually through exposure to air and moisture. This living finish suits rustic gardens, naturalistic planting, and warm toned stone or timber features. However, gardeners should plan drainage carefully because early runoff can stain nearby pale paving.
Powder coated metal adds colour and an extra protective layer over steel or aluminum cores. Gardeners can match borders to fences, furniture, planters, or house trim for a unified look. In addition, quality coatings resist chipping when installers use soft mallets and protective blocks.
Copper brings a distinctive warm glow that gradually shifts toward softer muted tones outdoors. It suits small feature borders, herb beds, and refined courtyard planting. Consequently, gardeners often reserve copper for focal areas rather than long boundary runs.
Material choice should follow garden use, climate, soil moisture, and desired appearance. Wet beds favour corrosion resistant options, while busy lawn edges favour thicker rigid profiles. Therefore, gardeners should compare strength, flexibility, finish, and maintenance before ordering any strips.
Metal Garden Edging Profiles And Finishes To Consider
Flat strips create the slimmest border and almost disappear beside lawns and planting. They suit minimalist gardens where plants, stone, and paving carry the visual interest. Additionally, flat profiles work well beside mowing strips and narrow path margins.
Rolled top strips add a rounded safety edge that feels smoother beside paths and play areas. Families often prefer this profile near lawns where children and pets move freely. Meanwhile, the rounded top also deflects mower wheels and reduces chipping along busy edges.
L shaped profiles anchor firmly into soil and resist sideways pressure from mulch, gravel, or raised beds. The horizontal foot spreads load and helps the strip stay upright through seasonal soil movement. Furthermore, this shape suits borders beside loose surfaces that push outward.
Corrugated profiles cast small shadows that add depth to otherwise flat border lines. Gardeners often explore corrugated metal garden edging ideas for bold texture beside planting. Similarly, their ridges increase stiffness, which helps longer strips hold shape without extra support.
Metal Garden Edging Profiles For Deeper Beds
Tall profiles contain deeper mulch layers and hold back soil in slightly raised beds. They create a stronger visual line and suit feature beds with bold structural planting. However, taller strips need deeper anchoring and careful levelling to avoid a leaning appearance.
Low profiles suit subtle separation between lawn and bed without dominating the planting scheme. They keep grass roots in check while leaving flowers and foliage as the main focus. In addition, low strips simplify mowing because wheels pass smoothly over the finished line.
Finish choices change how metal reads beside stone, timber, gravel, and foliage. Dark finishes recede into shadows and highlight green planting. In contrast, bright finishes catch light and draw attention toward crisp formal lines.
Texture also shapes garden character in quiet but noticeable ways. Smooth metal suits sleek courtyards, while weathered surfaces suit wilder planting and rustic features. Therefore, gardeners should test samples beside existing materials before committing to a full run.
Design Styles For Different Gardens
Contemporary gardens favour slim dark strips, straight lines, and generous planting blocks. Metal borders reinforce geometric beds and frame architectural plants with precision. Additionally, restrained finishes keep attention on foliage texture, flower colour, and paving patterns.
Contemporary schemes pair metal with gravel, large format paving, and bold ornamental grasses. Gardeners seeking inspiration often review modern metal garden edging ideas before choosing profiles and finishes. Similarly, repetition of one finish across beds creates calm visual order.
Cottage gardens gain structure from metal without losing their relaxed abundant character. Slim strips hold billowing perennials inside generous beds while paths stay clear. Furthermore, weathered finishes blend gently with timber, brick, and old stone features.
Naturalistic gardens use flowing arcs that echo meadow edges and woodland clearings. Flexible metal follows these curves and keeps loose mulch inside planting drifts. Meanwhile, muted finishes help borders disappear beneath grasses and seasonal perennials.
Formal gardens rely on symmetry, straight axes, and crisp intersections between lawn and bed. Metal strips hold these lines sharply through mowing, watering, and seasonal growth. Consequently, formal schemes benefit from rigid profiles and careful joint alignment.
Kitchen gardens need practical borders that contain soil, support paths, and simplify harvesting. Metal strips separate growing beds from access paths and keep compost and mulch contained. In addition, firm edges help gardeners work beds without collapsing soil into walkways.
Courtyard gardens benefit from metal because slim borders save precious planting space. Narrow strips frame small trees, climbers, and container groupings without bulky walls. Similarly, bright finishes reflect light and make enclosed spaces feel more open.
Decorative options include scalloped tops, perforated strips, and layered heights near focal planting. Many gardeners explore decorative metal garden edging designs for patterned tops and distinctive border details. However, decorative borders still need sound anchoring and sensible drainage beneath.
Planning Your Metal Garden Edging Layout
Good planning starts with walking the garden and observing sun, shade, drainage, and movement patterns. Gardeners should note wet corners, busy paths, mower routes, and tree roots before marking lines. Additionally, early observation prevents awkward intersections and difficult maintenance later.
Mark proposed lines with string, chalk, sand, or a garden hose for curved shapes. Stand back and view lines from windows, paths, and seating areas. Furthermore, viewing from several angles reveals bumps, pinches, and awkward angles that ground level checks often miss.
Measure every run carefully and allow extra length for joints, curves, and small cutting adjustments. Straight runs need fewer joins, while arcs need careful segment planning. Meanwhile, generous measurement prevents shortfalls that force awkward mid run connections.
Consider mower width, wheelbarrow access, and comfortable path widths during layout planning. Borders should leave enough room for routine care without crushing plants. Similarly, access routes should stay clear around beds that need frequent harvesting or pruning.
Drainage And Access For Metal Garden Edging
Plan intersections carefully where lawn, bed, path, and patio meet. Clean junctions look intentional and simplify mowing, sweeping, and edging work. Therefore, gardeners should decide which surface takes priority at each meeting point before installation begins.
Think about future planting growth when setting border lines. Shrubs spread, grasses arch, and perennials expand beyond their first season footprint. In addition, slightly generous beds reduce future crowding and keep borders visible as plants mature.
Drainage planning deserves attention before digging any trench or driving any stakes. Water should flow away from beds and paths rather than pooling beside metal strips. Consequently, gentle falls and free draining soil help borders stay stable and attractive.
Sketch the final layout on paper, even for small gardens. A simple sketch records lengths, curves, junctions, and material choices for ordering. Finally, a clear plan speeds installation and reduces mid project changes that waste time and material.
Tools And Safety Basics
Basic installation needs a spade, mallet, tape measure, level, string, and sturdy gloves. Gardeners also need a pencil for marking cuts and a straight edge for checking alignment. Additionally, safety glasses protect eyes during cutting, hammering, and soil clearing work.
A rubber mallet protects metal finishes better than a steel hammer during seating and adjustment. Place a timber block over the strip before tapping to spread force evenly. Meanwhile, gentle repeated taps seat strips more cleanly than single heavy blows.
Cutting tools depend on metal type, thickness, and profile shape. Hacksaws suit thin strips and small adjustments, while metal snips suit lighter aluminum sections. Furthermore, installers should keep blades sharp because dull blades wander and create rough edges.
Safety gloves matter because fresh cut metal edges can feel sharp and catch skin easily. Wear close fitting gloves that still allow firm grip and precise handling. Similarly, long sleeves protect forearms when gardeners reach into trenches or handle long strips.
Check for buried cables, pipes, and irrigation lines before digging anywhere in the garden. Mark known service routes and dig carefully near them with hand tools. Therefore, cautious preparation protects services and prevents dangerous surprises during trench work.
Keep work areas tidy while cutting and fitting long strips. Stack offcuts safely, sweep metal fragments from paths, and store tools away from walkways. In addition, tidy work reduces trips and keeps sharp edges away from children and pets.
Work in dry stable conditions whenever possible, especially on slopes or beside loose gravel. Wet soil shifts easily and makes levelling harder during installation. Consequently, gardeners should pause heavy work during storms and resume when ground firms up.
Metal Garden Edging Step By Step Installation
Begin by marking the final border line clearly across lawn, soil, or path margins. Use string for straight runs and a hose for arcs and circles. Additionally, double check the line from seating areas and windows before digging any soil.
Dig a narrow trench along the marked line to the depth suited to strip height. Remove roots, stones, and debris that could push strips out of alignment. Meanwhile, keep excavated soil nearby for backfilling after seating and levelling.
Level the trench base carefully so strips sit evenly without rocking or dipping. Use a straight timber board or level to check long runs. Furthermore, small base adjustments now prevent visible waves along the finished top line.
Place the first strip into the trench and check its height against surrounding soil and lawn. Leave a small consistent lip above ground for a clean visible edge. Similarly, consistent height across runs gives the border a professional finished appearance.
Stakes, Backfill, And Finishing Touches
Join additional strips with compatible connectors, overlaps, or interlocking tabs as supplied. Align joints carefully and check that top lines meet without steps. Therefore, patient joint work prevents gaps that later collect soil and weeds.
Drive stakes or anchors firmly beside strips, spacing them evenly along each run. Stakes should sit flush enough to avoid mower damage or tripping hazards. In addition, extra stakes near joints and curves add stability where movement pressures concentrate.
Backfill soil firmly on both sides of each strip and compact gently with feet or a tamper. Firm soil locks strips upright and prevents gradual leaning. Subsequently, water the backfill lightly so soil settles evenly around stakes and joints.
Finish by clearing loose soil from lawns and paths and checking the full border line. Step back, look along each run, and adjust any high or low sections. Finally, add mulch up to the border without burying the visible metal lip.
Cutting And Joining
Measure twice before cutting any strip, especially near corners, junctions, and curved transitions. Mark cut lines clearly with a pencil and check measurements against the trench. Additionally, careful marking reduces waste and keeps joints tight and tidy.
Cut slowly and steadily along the marked line, keeping the strip firmly supported. Support near the cut prevents vibration, bending, and ragged edges. Meanwhile, steady pressure produces cleaner cuts than rushed forceful strokes.
Smooth every cut edge with a metal file or abrasive paper before installation. Additionally, smooth edges protect hands, reduce coating damage, and improve joint fit. Furthermore, sealing cut ends on coated steel helps restore protection against moisture.
Clear cutting methods help beginners choose suitable tools and safe working positions. Gardeners needing practical guidance often study how to cut metal garden edging before first cuts. Similarly, practice cuts on offcuts build confidence before cutting final lengths.
Join strips so top edges align perfectly across every connection point. Misaligned joints catch light and draw attention away from planting. Therefore, check alignment from several angles before driving final stakes or compacting backfill.
Use connectors designed for the chosen profile rather than improvised fixings that may slip. Compatible connectors distribute stress evenly and keep joints stable through soil movement. In addition, matching connectors preserve finish and prevent galvanic problems between different metals.
Corners need special care because sharp bends stress metal and distort profiles. Use corner pieces where available, or form gentle angles across two short sections. Consequently, planned corners look intentional and resist opening under soil pressure.
Leave small expansion gaps where long straight runs cross sunny exposed areas. Metal expands slightly with heat, and tight runs can buckle or push joints apart. Finally, discreet gaps protect long borders without creating visible breaks.
Shaping Borders Around Bends
Gentle arcs suit most garden beds because they feel natural and simplify mowing around planting. Flexible strips bend smoothly when gardeners apply even pressure along their length. Additionally, gradual bending prevents kinks that spoil the border line.
Mark curves with a hose and adjust the shape until it looks balanced. Walk around the curve and view it from paths and seating areas. Furthermore, early adjustment costs little compared with reshaping installed strips.
Bend strips gradually in small stages rather than forcing one sharp movement. Work along the strip, checking curvature against the marked line frequently. Meanwhile, short sections handle tight arcs better than long rigid lengths.
Curved installation rewards patience, even pressure, and frequent alignment checks. For curved beds, install metal garden edging around curves with patience and frequent alignment checks. Similarly, temporary stakes help hold arcs in shape during backfilling.
Support curves with extra stakes near the tightest points and at segment joints. Curves push outward under soil and mulch pressure, especially after heavy rain. Therefore, closer staking keeps arcs true through seasonal soil movement.
Avoid sharp angles where possible because abrupt turns stress metal and create awkward planting pockets. Replace sharp corners with generous arcs that suit mower movement and plant growth. In addition, smooth transitions look more natural beside lawns and paths.
Check curved top lines carefully because dips stand out strongly along arcs. Sight along the curve from both ends and adjust height before final compaction. Consequently, level arcs frame planting beautifully and guide the eye through the garden.
Backfill curves gradually, compacting soil in stages rather than dumping large loads at once. Staged backfill holds shape and prevents strips from springing outward. Finally, mulch up to curved borders without piling material against the visible metal face.
Working With Slopes And Levels
Sloped gardens need borders that manage soil movement, water flow, and level changes gracefully. Metal strips can step down slopes in short level sections that follow the land. Additionally, stepped borders prevent soil wash while keeping planting areas usable.
Survey slope direction before planning any border, terrace, or path edge. Water follows the fall, so borders should guide runoff without trapping it behind strips. Furthermore, thoughtful placement reduces erosion and keeps lower beds from flooding.
Terrace small level changes with short stepped runs rather than one long sloping strip. Each step creates a stable planting shelf and a clear visual rhythm. Meanwhile, stepped sections also simplify mowing and access across sloping ground.
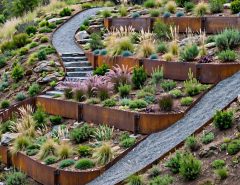
Sloped borders need deeper anchoring where soil pressure builds behind strips. Gardeners planning hillside planting often explore metal garden edging for sloped yards for stepped layouts and drainage. Similarly, extra stakes near steps resist downhill creep through wet seasons.
Retaining soil on slopes demands stronger profiles and careful backfill compaction. Tall strips hold more soil but face greater pressure from saturated ground behind them. Therefore, gardeners should choose rigid profiles and firm anchoring for retaining roles.
Drainage gaps and free draining backfill help sloped borders survive heavy rain. Water trapped behind a solid strip can push soil forward and tilt the border. In addition, gravel or coarse soil behind strips improves drainage without weakening support.
Paths across slopes need borders that stay visible and safe underfoot. Low consistent lips guide movement without creating trip hazards on inclined routes. Consequently, installers should test path borders by walking the route before final backfilling.
Maintain sloped borders with regular checks after storms and seasonal soil shifts. Look for leaning sections, exposed stakes, and soil build up behind strips. Finally, early adjustments keep small slope problems from becoming major border failures.
Borders For Paths And Gravel Areas
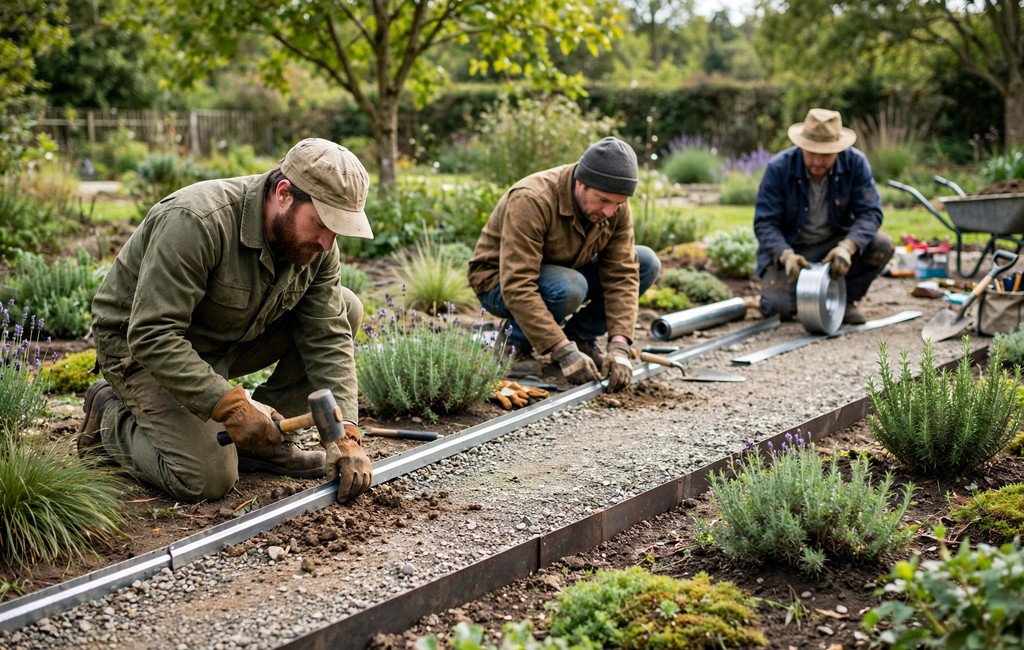
Paths need firm borders that contain loose surfaces and define clear walking lines. Metal strips stop gravel, bark, and mulch from spreading onto lawns and planting. Additionally, crisp path edges make gardens feel intentional and easier to maintain.
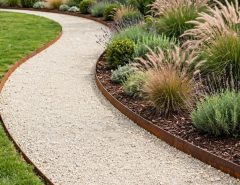
Gravel paths benefit from slightly taller strips that hold loose stones during rain and foot traffic. The strip should sit high enough to contain gravel without blocking drainage. Meanwhile, a firm border also simplifies raking and periodic gravel topping.
Good path borders balance containment with water movement across the path surface. Gardeners designing loose walks often consult metal garden edging for gravel paths for containment and drainage. Similarly, level top lines prevent gravel from pooling at low points.
Separate path foundations from planting soil with a clear metal line. This separation prevents soil from migrating into gravel and keeps path surfaces cleaner. Therefore, paths stay firmer and need less frequent clearing and resurfacing.
Choose corrosion resistant finishes beside gravel because stones trap moisture against metal surfaces. Wet gravel holds dampness after rain and increases corrosion risk for unprotected steel. In addition, regular clearing prevents damp debris from sitting against strips.
Keep path borders visible above gravel so walkers can see the edge clearly. Buried borders lose containment value and allow stones to drift outward unnoticed. Consequently, installers should set path strips slightly proud of the finished gravel level.
Intersections between paths, lawns, and beds need careful joint planning. Path borders should meet bed borders cleanly without gaps or overlapping lips. Finally, tidy junctions prevent loose material from escaping at the weakest points.
Keeping Mulch Soil And Lawns Separate
Metal borders excel at separating mulch from lawn because slim strips block creeping grass roots. Grass spreads through runners that cross soft boundaries easily, but firm metal interrupts that movement. Additionally, clean separation reduces lawn invasion into beds and bed spill onto grass.
Mulch stays inside beds longer when borders sit slightly above mulch level. Contained mulch insulates soil, suppresses weeds, and retains moisture for roots. Meanwhile, contained mulch also looks tidier after wind and rain disturb loose surfaces.
Soil retention matters most in raised beds and beds beside paths or patios. Metal strips hold soil in place while gardeners dig, plant, and water. Furthermore, firm containment prevents soil loss that gradually lowers bed levels and exposes roots.
Clear bed borders simplify weeding, watering, feeding, and seasonal replanting work. Gardeners planning productive planting often use metal edging for garden beds to separate growing areas. Similarly, defined beds help gardeners rotate crops and manage soil improvement systematically.
Lawn Edges And Tree Circles
Lawn edges benefit from metal because mowers can follow a firm line without scalping bed plants. A consistent lip guides mower wheels and prevents accidental cutting into mulch. Therefore, lawns look sharper and beds suffer less mower damage through the growing season.
Tree circles gain definition from metal borders that contain mulch and protect roots. Mulch rings conserve moisture and reduce grass competition around young trees. In addition, firm rings keep mowers and trimmers away from vulnerable bark.
Vegetable beds need borders that withstand digging, watering, and frequent access. Metal strips resist spade contact better than soft borders and keep paths clear. Consequently, productive gardens stay organised through busy growing and harvesting periods.
Flower beds benefit from metal because slim borders do not compete with blooms and foliage. Planting takes centre stage while the border quietly maintains order. Finally, consistent bed lines connect separate flower areas into one coherent garden design.
Rust Causes And Simple Prevention
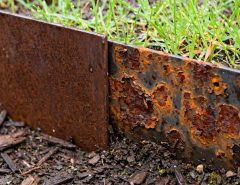
Rust forms when unprotected steel meets moisture, oxygen, and time in damp soil or air. Scratches, cut ends, and damaged coatings expose bare steel to these elements. Additionally, standing water accelerates corrosion by keeping metal surfaces wet for long periods.
Soil chemistry also influences corrosion because acidic soils and certain fertilisers attack protective coatings. Wet mulch piled against metal traps moisture and speeds surface breakdown. Meanwhile, good drainage and air movement reduce the damp conditions that favour rust.
Dissimilar metals can cause faster corrosion when they touch in wet conditions. Gardeners should avoid mixing incompatible fixings, stakes, and strips without checking compatibility. Furthermore, matching metals and connectors reduces unwanted chemical reactions at joints.
Early investigation usually reveals coating damage, poor drainage, or prolonged damp debris contact. Many gardeners ask why metal garden edging rusts after noticing orange staining on steel borders. Similarly, prompt cleaning and sealing prevent small spots from spreading widely.
Metal Garden Edging Rust Prevention Steps
Prevention starts with choosing suitable materials and coatings for local moisture conditions. Galvanized, stainless, powder coated, and aluminum options resist corrosion in different ways. Therefore, material choice should reflect rainfall, irrigation, soil type, and exposure.
Seal cut ends, scratches, and drilled holes promptly with compatible protective coatings. Touch up work restores barrier protection before moisture reaches bare steel. In addition, inspect borders after installation and again after the first wet season.
Keep borders clear of damp debris, dense mulch piles, and standing water. Clear soil away from metal faces during seasonal bed work and check drainage after storms. Consequently, simple housekeeping extends border life far more than occasional major repairs.
Corten steel deserves separate understanding because its rust layer protects rather than weakens the core. Stable patina forms through wet and dry cycles in well drained air. Finally, gardeners should allow patina to stabilise naturally instead of sealing it prematurely.
Cleaning And Seasonal Care
Routine cleaning keeps metal borders attractive and reveals early damage before it spreads. Wipe strips with water and a soft cloth to remove soil and algae. Additionally, gentle cleaning preserves coatings better than abrasive scrubbing or harsh chemicals.
Inspect borders each season for leaning sections, loose stakes, gaps, and coating damage. Seasonal checks catch movement after frost, heavy rain, and soil settling. Meanwhile, small adjustments during inspection prevent larger realignment work later.
Realign leaning strips by loosening nearby stakes, resetting height, and compacting backfill firmly. Check top lines from several angles before driving stakes fully home. Furthermore, patient realignment restores crisp lines without replacing entire runs.
Tighten or replace loose connectors promptly because gaps collect weeds and allow soil migration. Compatible replacement parts maintain strength and finish across the border. Similarly, matching connectors prevent mixed metal problems at repaired joints.
Refresh mulch and soil levels beside borders after seasonal settling. Top up beds without burying metal lips or piling damp material against strips. Therefore, balanced levels keep borders functional and visually clear through the growing season.
Protect finishes during nearby digging, pruning, and construction work. Cover exposed strips or work carefully around them with hand tools. In addition, brief protection prevents scratches that later become rust starting points.
Winter care focuses on drainage, debris clearing, and frost movement checks. Clear fallen leaves from border lines so moisture does not sit against metal. Consequently, autumn clearing reduces damp contact through the wettest months.
Record border materials, finishes, and installation details for future maintenance reference. Simple notes help gardeners choose compatible touch up coatings and connectors later. Finally, good records save time when extending or repairing borders in future seasons.
Comparing Metal With Other Materials
Plastic borders cost less initially and bend easily around curves, but they often lack long term rigidity. Sun exposure can make plastic brittle, while mowers can crack thin profiles. Additionally, plastic borders may lift during frost or shift under soil pressure.
Metal generally offers greater rigidity, slimmer profiles, and stronger resistance to mower contact. Gardeners weighing long term value often compare metal garden edging vs plastic edging before choosing materials. Similarly, metal holds straight lines better through seasonal soil movement.
Timber borders bring warmth and a substantial presence, but timber needs protection against rot and insects. Additionally, timber occupies more width than slim metal strips. However, timber suits rustic schemes where a chunky border forms part of the design.
Stone and brick borders create bold permanent lines and useful mowing strips. They need solid foundations and careful levelling to avoid movement. Furthermore, stone borders cost more labour and occupy wider ground than metal alternatives.
Choosing Between Metal And Other Materials
Concrete borders offer permanence and clean lines for formal paths and driveways. They resist movement well but prove difficult to move or reshape later. Meanwhile, concrete suits fixed layouts where garden plans will not change substantially.
Rubber borders flex easily and suit play areas, but they can look less refined beside formal planting. Similarly, rubber moves under soil pressure unless installers anchor it thoroughly. In contrast, metal provides crisper lines for gardens that prize precise definition.
No single material suits every garden, path, bed, or budget. Gardeners should weigh durability, appearance, flexibility, maintenance, and future change. Therefore, metal often wins where slim strength, clean lines, and long service matter most.
Hybrid designs sometimes combine metal with stone, timber, or planting for layered effects. Metal can define the inner line while stone forms a mowing strip outside. Finally, thoughtful combinations exploit each material strength without compromising overall coherence.
Common Mistakes And Smart Fixes
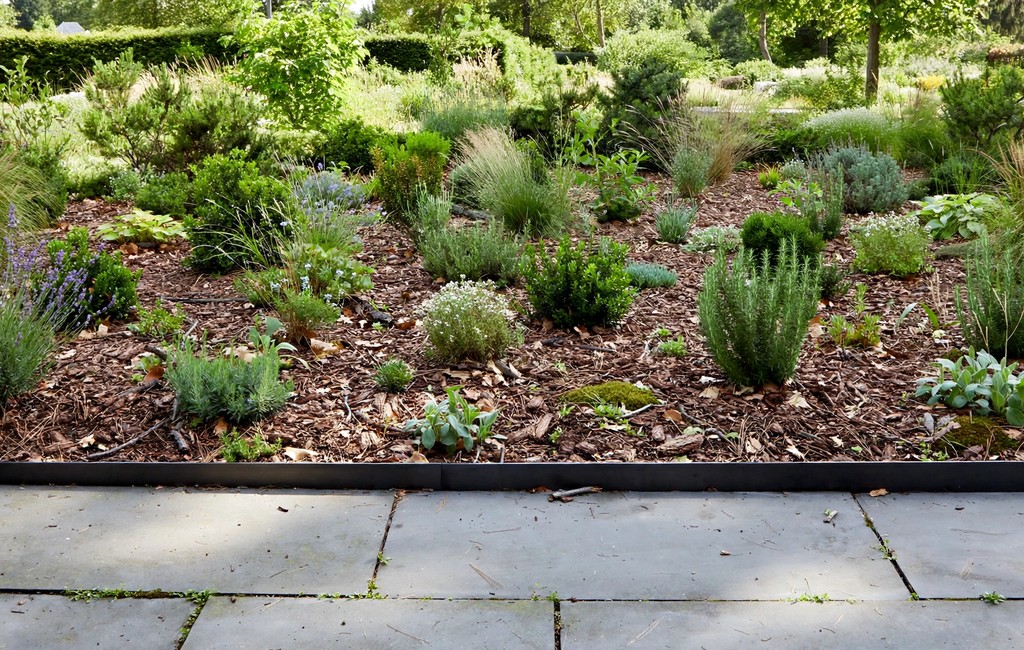
Shallow anchoring ranks among the most common metal border failures. Strips installed too shallow lean, lift, and drift under mower and soil pressure. Additionally, deeper burial with firm stakes gives borders the stability they need through seasons.
Uneven top lines spoil otherwise good installations because eyes follow height changes easily. Installers should check levels frequently during seating rather than correcting finished runs. Meanwhile, early levelling saves time and produces cleaner results.
Poor joint alignment creates steps, gaps, and weak points along border runs. Joints need careful matching before stakes go in and backfill compacts around them. Furthermore, patient joint checks prevent weed growth and soil escape through gaps.
Ignoring drainage causes water to pool behind strips and push soil forward. Borders beside slopes and low beds need drainage aware placement. Therefore, gardeners should shape ground falls before installing strips rather than after problems appear.
Cutting without sealing exposes coated steel to moisture at its most vulnerable points. Seal every cut promptly and inspect sealed ends after wet weather. In addition, sealing discipline protects the whole investment with minimal extra effort.
Overly tall borders can dominate small beds and create trip hazards beside paths. Height should suit bed depth, path use, and planting scale. Consequently, modest heights often look better and work more safely than dramatic tall strips.
Mixing incompatible metals at joints and stakes accelerates corrosion in damp conditions. Use matching fixings and check manufacturer guidance before combining materials. Similarly, consistent metal choices simplify future repairs and touch up work.
Rushing layout marking leads to awkward curves, pinched paths, and unbalanced beds. Slow marking, viewing, and adjustment produce borders that feel intentional. Finally, unhurried planning remains the cheapest way to achieve professional looking results.
Choosing The Right Height And Profile
Height choice should follow bed depth, mulch depth, path use, and planting scale. Deep beds need taller containment, while lawn edges need only a slim visible lip. Additionally, height decisions affect mowing ease, safety, and visual dominance.
Low strips suit lawn edges, subtle bed separation, and gardens that prize planting over borders. They define boundaries without interrupting views across lawns and flower areas. Meanwhile, low profiles reduce trip risk beside busy paths.
Medium strips suit most flower beds, vegetable beds, and gravel path margins. They contain mulch and soil while remaining easy to step over during garden work. Furthermore, medium heights balance visibility, containment, and safety for everyday gardens.
Tall strips suit raised beds, feature planting, and borders that retain soil beside lower ground. They create strong lines and contain deeper growing media. However, tall strips need stronger anchoring and careful levelling to stay upright.
Profile choice should also reflect foot traffic, mower contact, and nearby activities. Busy lawn edges benefit from rolled tops and rigid profiles. In contrast, quiet planting beds can use slim flat strips without safety concerns.
Finish and height together shape how borders read in the wider garden. Dark tall strips can feel imposing, while bright low strips can feel crisp. Therefore, gardeners should view sample heights beside existing planting before ordering full runs.
Consider maintenance access when choosing height because tall borders complicate stepping into beds. Gardeners need comfortable access for planting, weeding, and harvesting. In addition, access gaps or stepping points help in long continuous border runs.
Test height choices with temporary boards or string lines before final installation. Temporary mock ups reveal visual impact and practical issues cheaply. Finally, mock ups prevent expensive changes after strips arrive and trenches open.
Frequently Asked Questions
What materials work best for metal garden borders?
Steel, aluminum, stainless steel, and corten steel suit different gardens, climates, and design goals.
How do gardeners keep metal borders level during installation?
Gardeners level trench bases, check top lines frequently, and compact backfill gradually.
Can metal edging follow curved beds and winding paths?
Flexible metal follows gentle arcs well when installers bend strips gradually and stake curves firmly.
Does metal edging need regular maintenance through the seasons?
Metal needs only gentle cleaning, seasonal inspection, and prompt sealing of coating damage.
What causes rust on steel garden edging?
Moisture, coating damage, poor drainage, and damp debris expose steel and encourage rust formation.
Final Thoughts
Metal garden edging combines slim definition, lasting strength, and flexible design across many garden styles. Thoughtful material, height, and finish choices create borders that support planting rather than competing with it. Additionally, careful installation protects that investment through seasons of growth and weather.
Start with a clear layout, honest drainage assessment, and suitable materials for local conditions. Measure carefully, level patiently, and seal every cut before backfilling. Furthermore, seasonal inspection keeps small issues small and borders looking crisp.
Walk your garden, mark your preferred border lines, and compare samples beside stone, timber, and foliage. Choose the profile that suits your beds, paths, and maintenance routine. Finally, install your first run carefully and extend the design with confidence across the garden.

Leave a Reply