
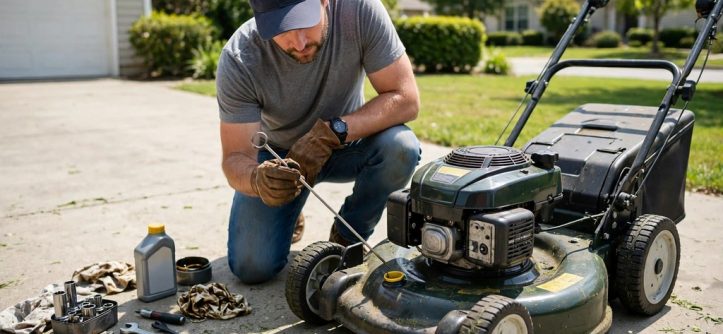
Consistent lawn mower repair maintenance keeps a mower starting easily and cutting cleanly every season. First, learn why your lawn mower won’t start before you replace any parts. Then follow a steady schedule for oil, fuel, spark, air, and blade care.
Most mower failures grow slowly from skipped checks and stale fuel. However, small habits prevent most breakdowns and protect the engine. For example, fresh oil and clean filters reduce wear during every cut.
This guide explains core schedules, main repair systems, and seasonal care. Moreover, you will learn tool basics and a calm troubleshooting mindset. Finally, you will judge confidently when repair beats replacement.
Start Every Job With Safety
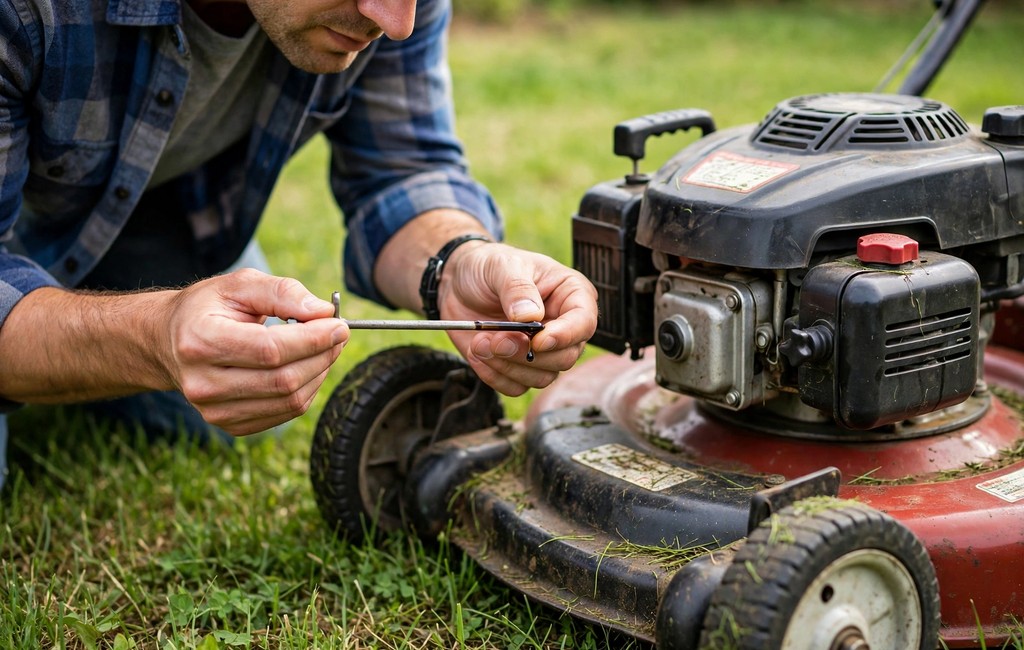
Safety habits protect your hands, eyes, and lungs during every repair. Always disconnect the spark plug wire before blade or underside work. Also, work only on a cooled engine for every task.
Prepare a Safe Work Area
First, park the mower on flat and stable ground outdoors. Next, clear children and pets from the work area completely. Then gather tools before you touch any fastener.
Good light reveals cracks, leaks, and frayed cables early. Moreover, a clean bench keeps small parts organized and visible. Still, keep rags nearby for quick oil cleanup.
Never rush a repair before dark or during bad weather. Instead, schedule enough time for careful and complete work. Consequently, calm pacing prevents most workshop mistakes.
Protect Your Hands and Eyes
Always wear gloves for blade handling during removal and sharpening. Additionally, wear sturdy shoes and long pants for underside work. Then add eye protection before grinding or scraping debris.
Blade edges cut skin even when they feel dull. For example, a slipping wrench drives hands toward sharp steel. Therefore, grip blades with thick gloves every time.
Hearing protection helps during long grinding or testing sessions. Meanwhile, a dust mask guards lungs during filter cleaning. Overall, simple gear prevents painful and lasting injuries.
Handle Fuel With Care
Always keep fuel away from ignition sources during refueling and repairs. Furthermore, refuel outdoors and let the engine cool first. Then wipe spills immediately with a clean rag.
Store gasoline only in approved and clearly labeled containers. Next, keep containers tightly sealed and away from heaters. Also, never smoke near open fuel or carburetor parts.
Manuals vary by model, so confirm every spec in the manual first. In fact, torque, capacity, and part details differ across engines. Hence, treat every general figure here as typical guidance only. Steady lawn mower repair maintenance prevents most of these failures before they start.
Follow a Simple Lawn Mower Maintenance Schedule
A simple schedule turns random repairs into predictable care. First, split tasks into per-use, monthly, and seasonal groups. Then follow the groups consistently during the mowing season.
Lawn Mower Maintenance Tasks for Every Use
Before each use, check oil level on the dipstick carefully. Next, inspect the fuel cap, tank, and lines for leaks. Also, clear sticks and stones from the mowing path.
After each use, brush grass from the deck top. Moreover, knock loose clippings from wheels and cooling fins. Still, let the engine cool before any close inspection.
- Oil level: Check the dipstick and add oil before every mowing session.
- Fuel supply: Fill the tank with fresh fuel and secure the cap.
- Blade area: Clear debris from the deck before you start the engine.
- Controls: Test the blade control bar and drive lever before mowing.
- Leaks: Scan hoses and the crankcase for fresh wet spots.
Monthly Lawn Mower Repair Checks That Prevent Trouble
Monthly checks catch wear before wear causes real damage. First, inspect the air filter for dirt and oil soaking. Next, examine blade sharpness and deck buildup closely.
Then tighten loose fasteners on handles, wheels, and guards. Additionally, inspect cables for fraying, rust, and stiff movement. Meanwhile, check tire pressure on self-propelled and riding models.
- Air filter: Inspect the element and clean or replace dirty media.
- Blade edge: Check sharpness and look for nicks, bends, and cracks.
- Fasteners: Tighten handle bolts, wheel bolts, and guard screws firmly.
- Cables: Inspect control cables for fraying and sluggish return action.
- Cooling fins: Brush dust and clippings from engine cooling fins monthly.
Seasonal Lawn Mower Maintenance That Extends Engine Life
Seasonal service resets the mower for reliable starting. Typically, owners change oil every fifty hours or each season. Always confirm the exact interval in your model manual.
Fresh spark plugs and clean filters support strong combustion. Typically, plugs last one season or about one hundred hours. Similarly, typical filters need attention every twenty-five hours.
Sharp blades cut cleanly and reduce engine strain noticeably. Typically, edges need sharpening every twenty to twenty-five hours. Finally, seasonal belt and cable checks prevent sudden failures. Simple lawn mower repair maintenance habits like this one save costly shop visits.
Gather Basic Lawn Mower Repair Tools and Supplies
Basic tools handle most mower repairs at home. First, buy quality tools once and store them dry. Then keep the kit near the mower always.
Hand Tools for Lawn Mower Repair Jobs
A socket set and combination wrenches fit most fasteners. Moreover, a spark plug socket speeds plug changes greatly. Also, screwdrivers and pliers handle clamps and cables.
A torque wrench helps you tighten critical fasteners correctly. However, manuals vary, so confirm each typical torque range first. Then tighten blade bolts firmly and recheck them after testing.
- Socket set: Loosen blade bolts, shroud screws, and engine cover fasteners.
- Spark plug socket: Remove plugs safely without cracking the ceramic insulator.
- Metal file: Restore blade edges between full grinding sessions at home.
- Blade balancer: Check balance after sharpening and prevent harmful vibration.
- Drain pan: Catch used oil cleanly during every oil change task.
- Work gloves: Protect hands during blade handling and deck scraping jobs.
Lawn Mower Repair Supplies Worth Keeping Nearby
Keep fresh engine oil and a spare spark plug ready. Additionally, stock a spare air filter for dusty weeks. Then add fuel stabilizer for storage and long pauses.
Penetrating oil loosens rusted fasteners without excessive force. Meanwhile, shop towels and degreaser simplify messy cleanups. Overall, ready supplies turn small problems into quick fixes.
Label shelves and keep small parts in closed containers. For instance, gaskets and clips vanish quickly on benches. Consequently, tidy storage saves money and frustration later. In practice, lawn mower repair maintenance works best as a routine, not a rescue.
Lawn Mower Fuel System Care and Repair
Clean fuel keeps small engines starting and running smoothly. First, understand that gasoline ages quickly in open containers. Then treat fuel freshness as a core maintenance habit.
Start With Fresh Fuel for Lawn Mower Repair
Stale fuel leaves varnish inside tanks, lines, and carburetors. Moreover, ethanol blends attract moisture during humid storage. Therefore, buy small amounts and rotate stock frequently.
Drain suspect fuel into an approved container for disposal. Next, refill the tank with fresh fuel before testing again. Still, keep fuel away from ignition sources during draining.
A fuel stabilizer slows aging during storage and pauses. Additionally, stabilizer protects carburetor passages between mowing weeks. Always follow label directions and your manual guidance together.
Inspect Fuel Lines and Filters
Cracked fuel lines leak and starve the engine under load. First, squeeze lines gently and look for splits or stiffness. Then replace brittle sections with correct typical fuel line.
A clogged fuel filter blocks flow and mimics carburetor faults. Meanwhile, sediment in the tank reappears after every cleaning. Consequently, rinse the tank whenever you replace the filter.
Check the fuel cap vent during stalling investigations too. For example, a blocked vent creates vacuum and stops flow. Simply loosening the cap briefly confirms this hidden cause.
Clean the Carburetor With Patience
The carburetor mixes fuel and air for smooth combustion. Tiny jets clog easily when stale fuel sits inside. Hence, carburetor cleaning solves many stubborn starting problems.
Next, learn to clean a carburetor step by step whenever stale fuel leaves varnish deposits. Photograph linkages before removal and organize every small part. Then clean passages gently and avoid forcing wires through jets.
Work only on a cooled engine during carburetor service. Additionally, disconnect the spark plug wire before removing parts. Finally, replace damaged gaskets and reassemble parts in order. Each check here belongs to a complete lawn mower repair maintenance routine.
Lawn Mower Repair Basics: Change Oil and Protect the Engine
Clean oil lubricates bearings, pistons, and other moving parts. First, dirty oil accelerates wear inside every small engine. Then timely changes extend engine life more than anything.
Drain and Refill With Care
Learn to change lawn mower oil while the engine still holds slight warmth. Warm oil drains faster and carries more suspended dirt. Then refill slowly and check the dipstick twice.
Typically, small engines hold under one quart of oil. However, capacities vary, so confirm your level by dipstick only. Also, recycle used oil through proper local collection channels.
Run the engine briefly after refilling the crankcase. Next, stop the engine and recheck the level carefully. Finally, inspect the drain plug area for fresh leaks.
Read the Dipstick Correctly
Park on level ground before you read the dipstick. Moreover, wipe the dipstick clean before the first reading. Then insert it fully and read the level again.
Low oil overheats parts and triggers severe internal damage. Conversely, excess oil foams and pushes past seals. Therefore, keep the level between the dipstick marks always.
Dark oil signals age, heat, and suspended contaminants. For instance, gritty oil demands an immediate change schedule. Still, fresh oil looks amber and feels smooth. Consistent lawn mower repair maintenance keeps small wear from becoming real damage.
Lawn Mower Maintenance: Sharpen the Blade and Clean the Deck
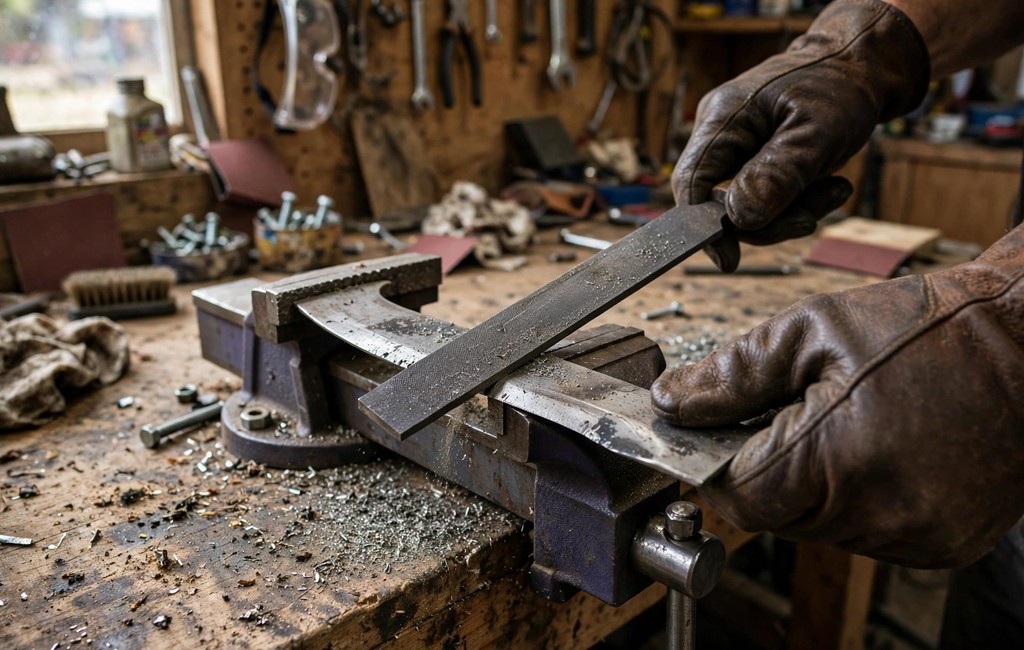
A sharp blade slices grass and protects lawn health. First, dull edges tear grass and invite disease. Then regular sharpening improves cut quality and engine efficiency.
Remove the Blade Safely
Always disconnect the spark plug wire before blade or underside work. Additionally, wear gloves for blade handling during every removal. Then block the blade with wood before loosening bolts.
Tip the mower with the carburetor side facing upward. Meanwhile, support the deck firmly on stable blocks. Also, photograph blade orientation before you remove it.
Inspect the blade for bends, cracks, and deep nicks. However, replace damaged blades instead of sharpening them. Consequently, you avoid dangerous imbalance and vibration later.
Sharpen and Balance the Blade
Next, learn to sharpen a lawn mower blade whenever grass tips look torn and pale. Follow the original edge angle with steady file strokes. Then remove equal metal from both cutting ends.
Balance the blade on a balancer after each sharpening. For example, a heavy end dips and reveals imbalance clearly. Simply file the heavy end until balance looks even.
Excess vibration loosens fasteners and damages crankshaft bearings. Moreover, balanced blades spin smoothly and cut evenly. Finally, tighten the blade bolt firmly before testing.
Scrape and Wash the Deck
Packed grass traps moisture against the steel deck. First, scrape buildup after the deck cools completely. Then rinse surfaces lightly and dry them thoroughly.
Rust weakens decks and spreads quickly under clippings. Additionally, clean decks discharge grass far more efficiently. Still, keep water away from bearings and electrical parts.
Touch up bare metal with protective paint during seasonal service. Meanwhile, inspect the discharge chute for cracks and blockages. Overall, clean decks last longer and mow better. Owners who schedule lawn mower repair maintenance rarely face surprise breakdowns.
Lawn Mower Repair: Service the Spark Plug and Air Filter
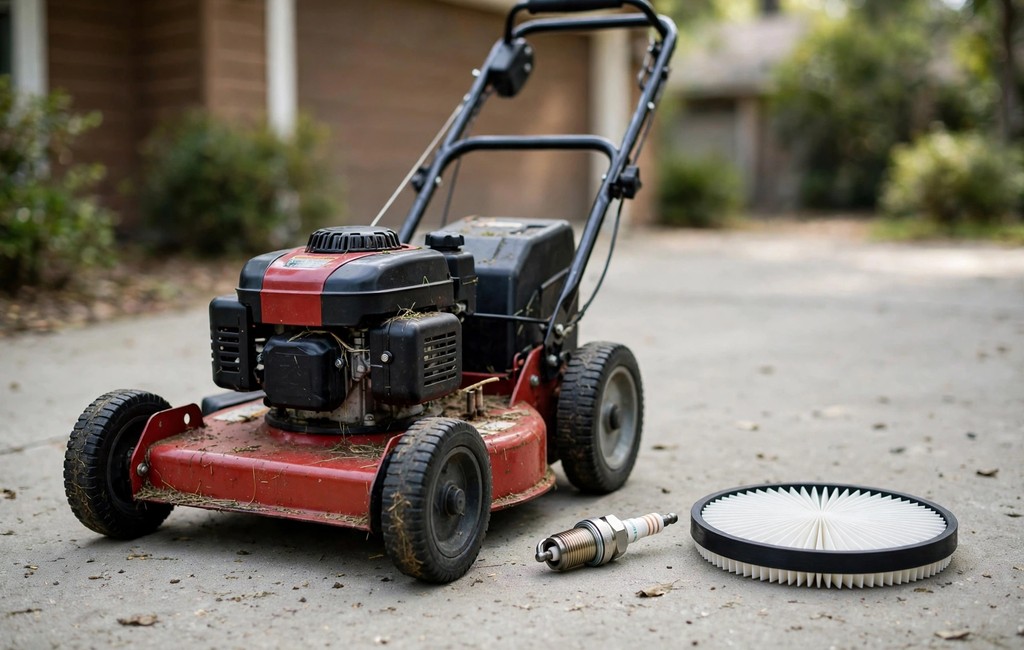
Strong spark and clean airflow complete the combustion recipe. First, engines need fuel, spark, air, and compression together. Then weak spark or blocked air prevents starting entirely.
Inspect and Replace the Spark Plug
Also, learn to replace a lawn mower spark plug whenever starting grows slow and rough. Remove the plug and read its color carefully. Then compare the appearance against typical fouling patterns.
Black soot suggests rich running or extended low speed use. Moreover, white deposits suggest overheating or lean running conditions. Meanwhile, oil fouling suggests worn rings or overfilling.
Check the electrode gap with a feeler gauge carefully. However, typical gaps vary, so confirm your manual specification first. Finally, thread new plugs by hand before tightening gently.
A loose plug wire mimics a failed plug perfectly. For instance, corrosion inside the boot weakens spark delivery. Therefore, clean terminals and seat the boot firmly.
Clean or Replace the Air Filter
A dirty air filter chokes airflow and wastes fuel. First, tap paper elements gently and inspect them closely. Then replace paper elements whenever light stops passing through.
Foam elements tolerate washing with mild soap and water. Additionally, dry foam fully before reinstalling it again. Some manuals specify light oil on foam elements only.
Dusty conditions shorten filter life far below typical intervals. Consequently, check filters monthly during dry and dusty spells. Still, never run the engine without a filter installed. This step is a core part of lawn mower repair maintenance for every engine size.
Repair Lawn Mower Smoke Problems Before Damage Spreads
Smoke color tells a useful story about engine health. First, watch color, timing, and oil level together. Then stop the engine before minor faults cause damage.
Read Smoke Color Carefully
First, review lawn mower smoking causes whenever blue or white smoke appears. Blue smoke usually signals burning oil inside the cylinder. Meanwhile, white smoke often signals moisture or excess fuel.
Black smoke usually signals an overly rich fuel mixture. Moreover, a clogged air filter often drives black smoke. Therefore, clean the filter before adjusting anything else.
Brief smoke after tipping often clears within minutes. For example, oil enters the muffler during careless tipping. Still, persistent smoke demands careful diagnosis before mowing.
Fix Common Smoke Causes
Overfilled crankcases push oil into the air filter housing. First, correct the oil level on level ground. Then clean or replace the soaked filter element.
Worn rings and seals let oil pass into combustion. Additionally, a damaged head gasket creates similar symptoms. Consequently, internal wear usually needs professional assessment.
Never keep mowing while smoke pours from the engine. Instead, stop, cool the engine, and inspect calmly. Finally, document symptoms and guide the next repair step. Good lawn mower repair maintenance always starts with the manual for your model.
Repair the Lawn Mower Recoil Starter and Pull Cord
The recoil starter spins the crankshaft for every start. First, a healthy cord pulls smoothly and retracts fully. Then cord faults stop an otherwise healthy engine completely.
Inspect the Cord and Housing
Frayed cords snap suddenly during hard starting pulls. Moreover, cracked housings and worn pulleys worsen cord damage. Also, inspect the handle and knot during cord checks.
Next, learn to fix a broken pull cord whenever the recoil starter jams suddenly. Remove the starter housing and inspect the pulley carefully. Then check spring tension before you rewind anything.
Work only on a cooled engine during starter repairs. Additionally, disconnect the spark plug wire before removing housings. Finally, keep fingers clear of spring loaded parts always.
Rewind or Replace the Cord
Thread new cord through the pulley and handle carefully. First, wind the pulley against spring tension as directed. Then tie secure knots and trim excess cord neatly.
Test retraction several times before reinstalling the housing. Meanwhile, replace weak springs whenever retraction feels lazy. Overall, patient rewinding restores reliable starting at home.
A cord that pulls too easily signals deeper trouble. For instance, low compression or a sheared flywheel key follows impact. Therefore, investigate further before replacing parts blindly. Over time, lawn mower repair maintenance extends engine life by several seasons.
Lawn Mower Repair for Stalling and Rough Running
Stalling engines usually suffer fuel, air, or spark interruptions. First, note exactly when the engine dies each time. Then patterns guide you toward the right system quickly.
Check Fuel Flow First
Also, diagnose a mower that dies while running by checking fuel flow first. Loosen the fuel cap and test running again briefly. Then inspect the filter, lines, and tank outlet.
Water in fuel sinks and disrupts carburetor delivery. Moreover, debris flakes from old tanks clog tiny jets. Consequently, drain and clean the whole fuel path thoroughly.
Heat related stalling often points toward ignition coil failure. For example, coils fail hot and recover after cooling. Still, confirm spark during the failure before replacing parts.
Check Airflow and Spark Next
Tall grass overload stalls engines with dull blades faster. First, raise the cutting height for thick patches. Next, slow your pace and take narrower passes.
A loose blade or debris jam also stalls engines suddenly. Additionally, disconnect the spark plug wire before underside checks. Then clear jams with gloves and a wooden stick.
Rough running improves after you correct the base cause. Meanwhile, random part swapping wastes money and time. Finally, retest under load after every single adjustment. Treat this task as regular lawn mower repair maintenance rather than an emergency fix.
Lawn Mower Maintenance for Belts, Cables, and Drive Parts
Belts and cables transfer power and control to wheels. First, worn drive parts slip, squeal, and strain engines. Then timely inspection keeps self-propelled mowing smooth.
Inspect Belts for Wear
Cracks, glazing, and frayed edges signal belt replacement time. Moreover, stretched belts slip under load on hills. Also, check pulley grooves for rust and packed debris.
Always disconnect the spark plug wire before underside drive work. Additionally, wear gloves while handling pulleys and blade parts. Then route new belts exactly along the original path.
Photograph belt routing before removing any worn belt. For instance, twisted routing destroys new belts quickly. Consequently, careful routing protects your repair investment.
Adjust and Replace Control Cables
Stretched cables delay blade engagement and drive response. First, adjust cable tension at the handle bracket carefully. Next, lubricate pivot points and inspect return springs.
A broken engine brake cable prevents starting entirely. Meanwhile, frayed drive cables snap without much warning. Therefore, replace questionable cables before the season peaks.
Test controls fully after every cable adjustment session. Additionally, confirm the blade stops quickly after release. Finally, this safety check matters more than convenience.
Care for Self-Propelled Drive Parts
Dirty drive wheels lose traction on wet grass quickly. First, clean tread and inspect wheel gears monthly. Then replace worn wheels before traction disappears completely.
Transmission problems often begin as simple belt slip. Moreover, correct belt tension prevents expensive gearbox damage. Still, internal transmission faults usually need professional help.
Keep the drive cover clean and securely fastened always. For example, grass packs around pulleys and accelerates wear. Overall, clean drive systems pull evenly and last longer. A written lawn mower repair maintenance log makes each of these steps easier.
Seasonal Lawn Mower Maintenance Before Each Season
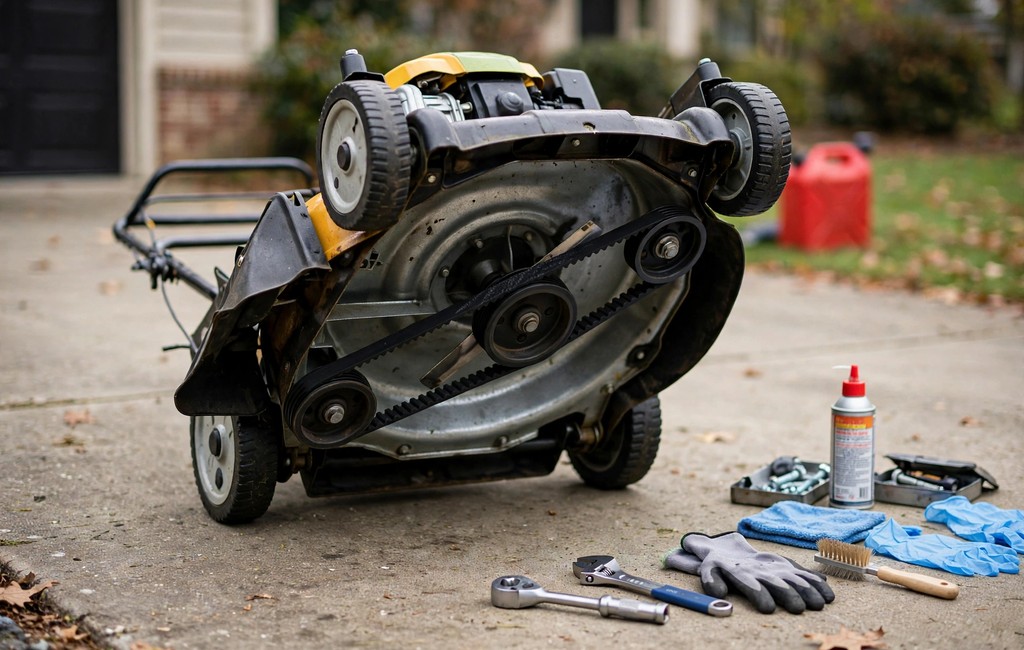
Seasonal care prevents storage damage and spring frustration. First, prepare the mower before long storage periods begin. Then wake it methodically before the first spring cut.
Wake the Mower in Spring
Inspect the whole mower before adding fresh fuel. Next, change oil, service filters, and sharpen the blade. Also, check cables, belts, and wheels for winter damage.
Charge or test batteries on electric start models early. Moreover, clean terminals and tighten connections firmly. Then test starting in an open and safe area.
Fresh fuel revives most stored engines without drama. For instance, drained systems avoid varnish and corrosion problems. Consequently, spring service feels quick after proper fall care.
Protect the Mower in Fall
Finally, learn to winterize a lawn mower before storage and prevent corrosion damage. Clean the deck, stabilize fuel, and fog internal parts. Then store the mower in a dry place.
Change oil before storage rather than after storage. Additionally, used oil holds acids that attack bearings quietly. Meanwhile, fresh oil protects parts during long rest.
Remove batteries and store them in cool dry places. For example, periodic charging preserves battery health during storage. Finally, cover the mower and block pest entry points. Seasonal lawn mower repair maintenance protects the mower while it sits unused.
Troubleshoot With a Calm Lawn Mower Repair System
A calm system turns confusing failures into clear steps. First, describe the symptom in plain and precise words. Then test the simplest and cheapest causes first.
Think in Fuel, Spark, and Air
Every gasoline engine needs fuel, spark, air, and compression. Moreover, testing in that order finds most faults fast. Also, safety steps come before every single test.
Confirm fuel reaches the carburetor before deeper disassembly. Next, confirm strong and consistent spark at the plug. Then confirm clean airflow through the filter housing.
Compression testing separates simple faults from internal damage. For instance, a sudden change after impact suggests mechanical damage. Still, most home failures stay within the first three systems.
Change One Thing at a Time
Change one variable and retest after every adjustment. Additionally, record each result in a simple notebook. Consequently, you learn exactly which fix worked.
Random part swapping hides causes and inflates costs. Instead, follow evidence from each test result carefully. Finally, patience produces reliable and repeatable repairs.
Stop and seek help whenever safety feels uncertain. Meanwhile, shops diagnose stubborn faults with specialized tools. Overall, knowing your limits protects you and the mower.
Decide Between Lawn Mower Repair and Replacement
Good decisions balance repair cost, mower age, and condition. First, assess the deck, engine, and drive system honestly. Then compare repair totals against replacement value realistically.
Repair When the Base Stays Sound
Solid decks and strong compression favor economical repairs. Moreover, plugs, filters, belts, and cables cost relatively little. Also, routine parts remain widely available for common models.
Repair also reduces waste and preserves a familiar machine. For example, a carburetor cleaning often restores full performance. Therefore, fix wear items before condemning the whole mower.
Consider your comfort level with each repair task carefully. Meanwhile, professional labor changes the calculation significantly. Still, many owners learn repairs quickly with guidance.
Replace When Damage Runs Deep
Cracked decks and bent crankshafts usually end economical repair. Additionally, severe internal engine wear demands costly rebuilding. Consequently, replacement often wins after major structural failure.
Unavailable parts also push older mowers toward replacement. For instance, obsolete transmissions and decks complicate every repair. Finally, weigh safety alongside cost in every decision.
Choose replacement when reliability matters more than savings. Overall, repeated breakdowns during peak season waste valuable weekends. Then recycle the old mower through proper channels responsibly.
Keep Simple Lawn Mower Maintenance Records and Habits
Simple records turn guesswork into planned maintenance. First, note dates, hours, parts, and symptoms after work. Then review notes before each seasonal service session.
Photographs preserve belt routing, linkage positions, and wiring paths. Moreover, photos save time during every reassembly task. Also, store photos beside your digital manual copy.
Track fuel purchases and mark container fill dates clearly. For example, dated fuel prevents accidental stale fuel use. Consequently, starting problems decline across the whole season.
Keep receipts for plugs, filters, belts, and blades together. Meanwhile, part details simplify future ordering and comparisons. Finally, manual notes confirm which specifications fit your model.
Lawn Mower Repair for Common Cutting Problems
Fix Uneven Cuts and Scalping
Uneven cuts often trace back to deck level problems. First, park on flat concrete and measure blade height. Then compare both sides and adjust the deck evenly.
Scalping exposes soil and stresses grass crowns badly. Next, raise cutting height on uneven ground sections. Also, slow down over bumps and hidden dips.
Dull or bent blades also create ragged stripes. Moreover, low tire pressure tilts the deck sideways. Finally, correct pressure and blade condition before mowing.
Restore Weak Cutting Power
Wet grass clumps under decks and steals power. First, mow dry grass whenever schedules allow it. Then take narrower passes through thick growth.
A slipping blade belt also reduces cutting force. Additionally, worn blade adapters wobble and waste energy. Still, inspect the drive path before condemning the engine.
Clean discharge chutes restore airflow through the deck. For example, packed chutes force clippings back downward. Consequently, cutting quality improves after simple cleaning.
Deepen Each Core Lawn Mower Repair Skill
Clean the Engine Exterior and Cooling System
Dirt blankets trap heat around small air cooled engines. First, brush fins and shrouds with a stiff brush. Then wipe surfaces before removing any engine covers.
Overheating warps parts and thins oil protection quickly. Moreover, blocked cooling passages shorten engine life silently. Always keep the blower housing intake screen clear.
Never spray cold water onto a hot engine. Instead, let parts cool and clean them dry. Finally, remove nests and debris after storage periods.
Service Wheels, Axles, and Height Adjusters
Wobbling wheels create uneven cuts and operator fatigue. First, inspect wheel bushings and axle bolts monthly. Then replace worn wheels before axles suffer damage.
Height adjusters rust and seize without regular attention. Additionally, a drop of oil frees sticky levers. Still, work adjusters through every setting after lubrication.
Matching wheel heights keep the deck level naturally. For instance, one low wheel tilts every cut. Therefore, measure all corners during seasonal service checks.
Inspect the Blade Adapter and Crankshaft Area
The blade adapter connects the blade to the crankshaft. First, inspect it whenever the blade strikes something hard. Then look for cracks, worn keys, and looseness.
A bent crankshaft causes severe and constant vibration. Moreover, continued running damages bearings and seals quickly. Consequently, stop mowing and seek professional diagnosis immediately.
Always disconnect the spark plug wire before any underside inspection. Additionally, wear gloves while turning the blade slowly. Finally, replace questionable adapters rather than forcing repairs.
Maintain the Muffler and Exhaust Area
A clogged muffler chokes exhaust and reduces power. First, inspect the spark arrestor screen for carbon buildup. Then clean deposits gently with a wire brush.
Work only on a cooled engine near exhaust parts. Moreover, hot mufflers burn skin almost instantly. Also, keep fuel away from hot exhaust surfaces always.
Excess noise often signals loose or damaged muffler hardware. For example, missing bolts let exhaust leak near operators. Finally, replace rusted mufflers before holes grow larger.
Build Confidence With Lawn Mower Repair Practice
Start With Easy Wins
Beginners build skill fastest through small successful repairs. First, master filters, plugs, and oil changes at home. Then progress toward carburetor and starter work gradually.
Watch each system function before disassembling it deeply. Additionally, label parts and photograph every stage carefully. Still, patience matters more than speed for beginners.
Celebrate each successful start after a careful repair. For instance, confidence grows quickly after early wins. Consequently, harder diagnoses feel manageable over time.
Learn From Every Repair Result
Every repair teaches something about your specific mower. First, record which symptom matched which root cause. Then use those notes during future troubleshooting sessions.
Mistakes also teach valuable lessons without lasting damage. Moreover, rechecking your own work builds careful habits. Always test thoroughly before returning the mower to service.
Share lessons with family members who use the mower. For example, simple warnings prevent repeated operating mistakes. Finally, shared knowledge keeps the machine healthier longer.
Teach Another Household Member
Teaching reinforces your own maintenance knowledge quickly. First, demonstrate oil checks and safe starting together. Then supervise blade inspections with gloves in place.
Clear rules prevent fueling mistakes and unsafe shortcuts. Additionally, show everyone the spark plug disconnect step. Still, reserve blade removal for trained adults only.
A shared checklist keeps standards consistent across users. Meanwhile, consistent care reduces surprise failures noticeably. Overall, households maintain machines better as a team.
Spend Wisely on Lawn Mower Repair Parts and Service
Choose Quality Wear Parts
Quality plugs, filters, and belts outlast cheap alternatives. First, match parts to your model and engine codes. Then verify dimensions before installing any replacement part.
Incorrect parts create new problems and waste money. For example, wrong belts slip, stretch, and overheat. Therefore, confirm fitment carefully before every purchase.
Keep one spare plug and filter on hand. Moreover, spares prevent weekend delays during peak season. Finally, store spares dry and clearly labeled.
Use Professional Help Strategically
Shops add value on internal engine and transmission work. First, describe symptoms, timing, and recent changes clearly. Then ask for diagnosis before authorizing major repairs.
Good shops explain findings in plain and honest language. Additionally, they return replaced parts for your inspection. Still, compare total estimates against replacement cost.
Build a relationship with one trusted local shop. For instance, familiar technicians remember your mower history. Overall, strategic help saves money across many seasons.
Plan an Off Season Project List
An off season list spreads costs and effort sensibly. First, write down every noticed squeak, leak, and vibration. Then rank tasks by safety impact first.
Order parts early and avoid peak season shortages. Moreover, early orders prevent rushed substitutions later. Also, confirm part numbers against your manual twice.
Finish projects before spring growth demands weekly mowing. For example, sharpen spare blades during quiet winter weeks. Finally, a ready mower starts the season strong.
Set a Simple Lawn Mower Maintenance Reminder System
Reminders keep busy owners on schedule throughout the season. First, place a service card near the mower. Then mark completed tasks with dates and hours.
Phone alerts also support monthly checks and seasonal service. Additionally, tie alerts to regular household routines. Still, written logs capture details that alerts miss.
Review your reminder system after the first season. For example, adjust intervals when usage patterns change. Consequently, the schedule stays realistic and useful.
Share the reminder habit with other household operators. Meanwhile, shared reminders prevent duplicated or skipped work. Overall, simple systems keep maintenance consistent and calm.
Frequently Asked Questions
Why Won’t My Lawn Mower Start?
First, check fresh fuel, spark, and airflow because most starting failures trace there.
How Often Should I Change Lawn Mower Oil?
Typically, change oil after fifty running hours or once each season at home.
How Often Should I Sharpen My Lawn Mower Blade?
Typically, sharpen the blade after twenty to twenty-five hours of mowing on lawns.
When Should I Replace a Lawn Mower Spark Plug?
Next, replace the plug each season or whenever electrodes show heavy fouling.
Should I Repair My Mower or Replace It?
Overall, repair the mower when parts stay available and total costs stay modest.
Conclusion
Consistent care keeps any mower safer, stronger, and cheaper. First, follow the schedule and respect every safety line. Then troubleshoot calmly with fuel, spark, and air checks.
Start today with oil, filter, plug, and blade checks. Next, record your findings and fix small faults immediately. Also, share these habits with anyone who borrows your mower.
Finally, review how to replace a self-propelled drive belt and restore confident traction. Then schedule your next service before small wear grows. Act now and give your mower a stronger season. Together, these habits form the backbone of lawn mower repair maintenance at home.


Leave a Reply