
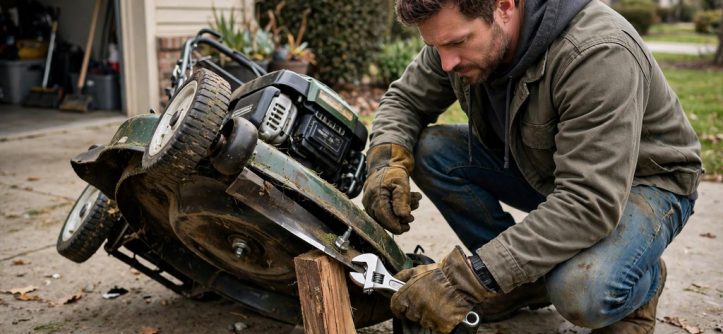
To sharpen lawn mower blade edges safely, you disconnect power, block the blade, and loosen the center bolt. Then you sharpen along the original bevel, check balance, and refit the blade correctly. This careful routine restores a clean cut without risking injury or vibration damage.
A dull blade tears grass tips and leaves pale, ragged edges behind. In contrast, a sharp blade slices cleanly and helps grass recover quickly. Before you start, however, safety preparation matters more than speed or sharpness.
This guide covers removal, filing, grinding, balancing, damage checks, and correct refitting. Additionally, it explains when replacement protects you better than another sharpening session.
Why a Sharp Blade Matters Most
First, check grass tips a day after mowing for white, frayed ends. Those torn tips lose moisture quickly and invite disease into stressed turf. Also, listen for vibration, uneven cutting, and strips of missed grass.
Blade care works best inside a wider lawn mower repair and maintenance routine. For example, clean airflow, fresh fuel, and sound spark plugs support clean cutting. Still, no tune-up compensates for a bent, cracked, or badly dulled blade.
Moreover, a clean cut reduces ragged entry points for lawn disease. Consequently, the mower engine works less hard pushing torn grass aside.
Gather Your Tools and Prepare Safely
First, park the mower outside or in a ventilated garage space. Then let the engine cool fully before you touch any metal parts. Never handle blade work on a warm engine or spinning blade.
Before work, disconnect the spark plug wire and move it aside. Also, turn the fuel valve off where your model has one. However, manuals vary by model, so confirm each preparation step first.
- Heavy gloves: Protect your hands whenever you grip, carry, or clean the blade.
- Socket wrench: Fits the center bolt and gives controlled leverage during removal.
- Wood block: Stops the blade from turning while you loosen the bolt.
- Mill file: Restores a dull edge slowly, accurately, and without excess heat.
- Bench vise: Holds the blade firmly so both hands control the file.
- Blade balancer: Reveals imbalance quickly, although a clean nail also works well.
Next, put on heavy gloves and eye protection before handling the blade. Then tip the mower with the air filter and carburetor side up. This position keeps oil and fuel away from the filter area.
Remove the Lawn Mower Blade Without Letting It Turn
First, mark the grass-facing side with chalk or a paint pen. That simple mark prevents the common mistake of refitting it upside down. Also, note the washer order before you loosen any hardware.
Next, wedge a sturdy wood block between blade and mower deck. The block holds the blade still while you apply wrench pressure. Then turn the center bolt in the direction your manual specifies.
Most center bolts loosen counterclockwise, but some models use reverse threads. Therefore, stop and check the manual if the bolt refuses to move. After removal, keep the bolt, washer, and blade adapter together safely. Most owners sharpen lawn mower blade edges two or three times each season.
Sharpen the Edge While Keeping Its Angle
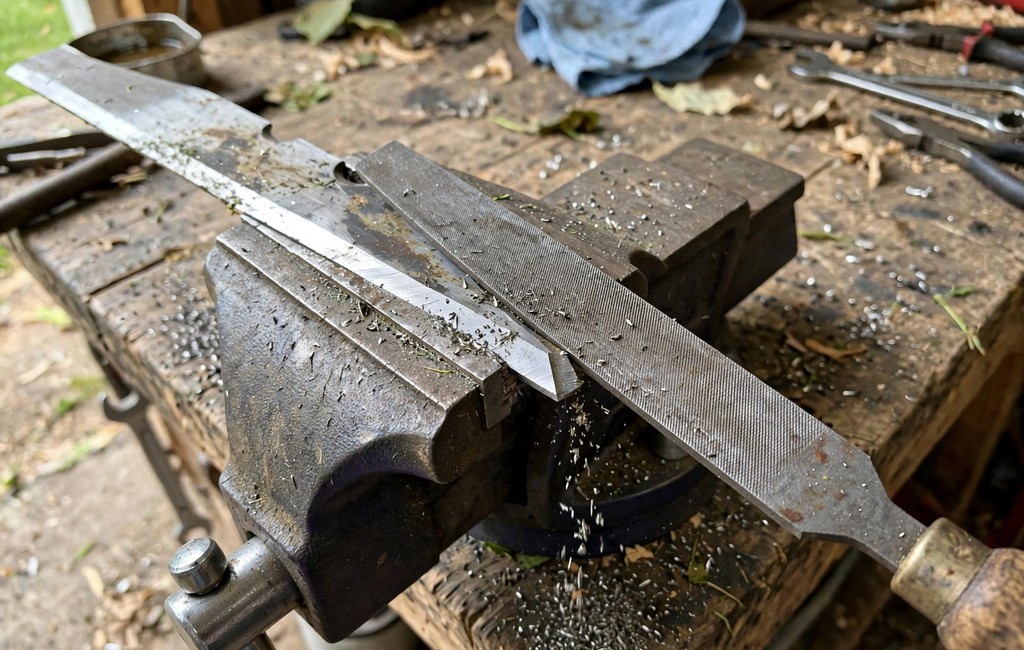
First, scrub packed grass, dirt, and rust from both blade surfaces. A clean surface reveals nicks, cracks, and the original bevel clearly. Then clamp the blade securely in a vise with padding.
Sharpen With a File
Hold a mill file flat against the existing bevel before starting. Then push the file toward the edge in smooth, single strokes. For example, count ten strokes, then repeat equal work on the opposite end.
Avoid sawing backward, because files cut mainly on the forward stroke. Also, aim for butter-knife sharpness rather than a thin razor edge. A razor edge chips quickly and dulls sooner under normal mowing.
Sharpen With a Grinder Carefully
Alternatively, use light grinder passes and keep the wheel moving constantly. Heavy pressure overheats steel, weakens the edge, and removes metal fast. If the edge turns blue, pause immediately and let it cool.
Above all, follow the factory bevel rather than inventing a new angle. Typical bevels fall around thirty to forty-five degrees on many blades. Still, your manual and the existing edge give the best guidance.
Check the Balance Before You Refit It
First, hang the blade by its center hole on a nail. Alternatively, set the blade on a cone balancer for clearer readings. A balanced blade stays level instead of tipping toward one end.
When one side drops, mark that heavier end before removing metal. Then remove a little metal from that end’s cutting edge. After each small adjustment, hang the blade and test it again.
Also, clean both blade ends before the final balance test. Packed grass adds false weight and hides the true heavy side. Finally, repeat the test until the blade rests nearly level twice. A balanced finish matters whenever you sharpen lawn mower blade steel.
Replace the Blade When Damage Goes Too Far
However, sharpening cannot rescue every blade that looks dull or rough. Inspect both ends, the center hole, and the lifted rear wings. Then choose replacement whenever damage threatens safe, balanced spinning.
- Any crack: Replace the blade immediately and never grind cracks away.
- Visible bend: Replace the blade because straightening rarely restores true balance.
- Deep nicks: Replace the blade when grinding would remove excessive metal.
- Thin edge: Replace the blade once repeated sharpening leaves little support.
- Worn wings: Replace the blade when lifted wings flatten, tear, or corrode.
- Damaged hole: Replace the blade if the center hole looks stretched.
Meanwhile, small nicks and a rounded edge usually respond to filing. Still, treat any doubt about cracks or bends as replacement territory.
Reinstall the Lawn Mower Blade in the Correct Position
First, position the blade with its marked grass-facing side facing down. The cutting edges face the direction of rotation underneath the deck. Also, the lifted wings point upward toward the mower deck above.
Next, refit the washer and adapter exactly as you removed them. Then start the center bolt by hand to avoid cross-threading it. After that, block the blade again before tightening with a wrench.
Typical torque for many walk-behind models falls around thirty to fifty foot-pounds. However, treat that range as typical only and confirm your specification. While the deck sits accessible, also change the mower oil during the visit.
Finally, reconnect the spark plug wire after every tool leaves the deck. Then lower the mower, restore fuel, and start it briefly outdoors. Listen for vibration, scraping, or looseness, and stop immediately if present. Wear gloves every time you sharpen lawn mower blade edges, even with hand tools.
Frequently Asked Questions
How often should you sharpen a lawn mower blade?
Typically, sharpen the blade after twenty to twenty-five hours of mowing use.
Can you sharpen a mower blade without removing it?
You can touch up an edge in place, but removal works safer.
Which way does a lawn mower blade go on?
Place the cutting edge toward rotation, with lifted wings facing up.
How sharp should a lawn mower blade be?
Aim for butter-knife sharpness, because razor edges chip and dull quickly.
What happens if a mower blade is unbalanced?
An unbalanced blade vibrates heavily and strains the spindle and bearings.
Finish With a Safer, Cleaner Cut
Now inspect your blade, gather your tools, and schedule this job today. Before storage season arrives, also winterize the mower before storage for protection. Then enjoy cleaner cuts, calmer running, and healthier grass growth afterward. Dull grass tips show why you should sharpen lawn mower blade edges sooner.




Leave a Reply