
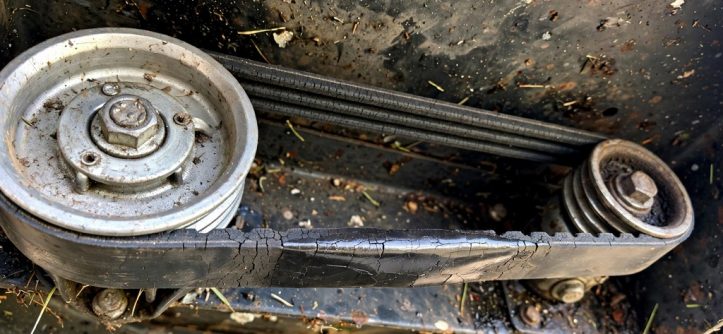
You replace the drive belt by accessing the pulleys, recording the routing, and fitting a matched replacement. First, disconnect the spark plug wire and work only on a cooled engine. Then, you test the self-propel drive before you mow again. Careful routing and tension checks restore strong wheel pull.
This guide covers the belt only and skips unrelated engine repairs. Also, regular lawn mower repair and maintenance helps you catch belt wear early. However, manuals vary by model, so you should always confirm specs first. Finally, you match the new belt to the model number every time.
Recognize a Worn or Stretched Drive Belt
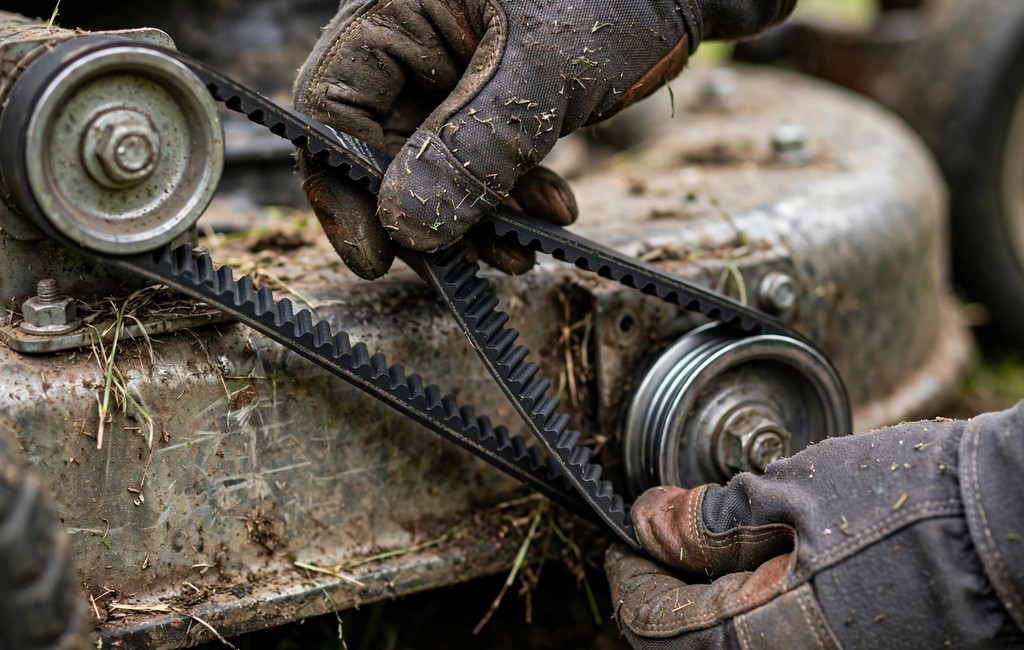
Typically, the engine runs normally while the drive wheels stop pulling. Next, the mower feels heavy because you push the full load yourself. Often, the drive slips badly on slopes or in thick grass.
Also, a worn belt often squeals loudly when you engage the drive. Similarly, jerky surging tells you the belt grips and releases unevenly. Meanwhile, a burning smell sometimes signals severe slipping and friction heat.
Also, weak pull often worsens gradually over several mowing sessions. However, sudden total loss usually indicates a snapped belt instead. Then, uneven pull can signal localized damage along one section.
First, you inspect the belt surface closely under good light. Then, you look for damage along both edges and faces.
- Visible cracks: Cracks show heat and age have hardened the rubber.
- Frayed edges: Frayed cords signal advanced wear and impending failure soon.
- Shiny glazed surface: Glazing reduces grip and lets the belt slip.
- Excess slack: Slack shows stretching and prevents firm pulley engagement.
- Missing chunks: Missing rubber creates vibration and uneven power delivery.
Therefore, you replace a belt showing any major damage sign. However, you also check the drive cable before you condemn the belt. Indeed, a loose cable can mimic several worn belt symptoms closely. Most owners replace drive belt parts in under an hour with basic tools.
Gather Tools and Prepare the Mower Safely
First, you park the mower on flat, dry, hard ground. Next, you let the engine cool completely before touching anything. Then, you disconnect the spark plug wire before any work under the deck.
Also, you gather basic hand tools and the correct replacement belt. For example, most jobs need only sockets, screwdrivers, and pliers.
- Work gloves: Gloves protect your hands around sharp deck edges.
- Eye protection: Glasses shield your eyes from falling grit and debris.
- Phone camera: Photos record belt routing before you remove anything.
- Matched replacement belt: Matching belts fit your specific model number correctly.
- Owner manual: Manuals confirm routing, specs, and fastener locations precisely.
Importantly, you wear gloves when working around the blade and belt. Also, you keep the spark plug wire away from the plug. Finally, you drain or secure fuel if your manual advises it.
Also, you confirm the belt part using your model number plate. Retailers and manuals match belts to model numbers, not guesses. Therefore, you avoid universal sizing claims and follow manufacturer guidance.
Access the Drive Belt Under the Deck or Cover
First, tip the mower with the air filter and carburetor side facing up. This position prevents oil and fuel from leaking during work. Then, support the mower firmly so it cannot roll or fall.
Next, remove the belt cover or guard using basic hand tools. However, designs vary, so some mowers hide belts under the deck. Also, some models place a second cover above the transmission pulley.
Sometimes, the design requires brief blade removal for clear access. Then, you can remove and sharpen the blade during that same access step. Otherwise, you leave the blade secured and work around it carefully.
Clean the Belt Area Before Inspection
First, brush packed grass and dirt from pulleys and guides. Next, wipe grit from grooves so you see wear clearly. Clean parts also help you judge belt condition more accurately. You should replace drive belt components before cracks reach the cord layer.
Record the Routing and Remove the Old Drive Belt
Before removal, photograph the full belt path from several angles. Also, sketch the routing if shadows hide any pulley turns. Then, note every guide, keeper, and spring the belt touches.
Next, release belt tension by moving the idler or transmission carefully. However, some designs simply let you roll belts off pulleys slowly. Then, ease the old belt past guides without bending metal parts.
After removal, lay the old belt beside the new belt. Also, compare length, width, and profile before you install anything. Finally, inspect pulleys for wobble, rust, grooves, and packed debris.
Fit the New Belt on Pulleys and Guides
First, seat the belt fully inside the engine pulley groove. Next, route the belt exactly along your photographed path. Then, work the belt onto the transmission pulley carefully.
Also, pass the belt inside every guide and keeper correctly. Meanwhile, keep belt twists out because twists cause rapid wear. However, rotate pulleys slowly by hand and watch belt tracking.
Also, spin each pulley and confirm the belt stays centered. Subsequently, tug the belt gently and check every guide contact. Finally, compare your installation directly against your routing photographs.
Check Tension Before You Close Covers
First, engage the drive control and observe belt tension change. A typical belt feels firm with only slight deflection under pressure. However, your manual defines correct tension for your specific model.
Next, adjust the drive cable if your design allows adjustment. Then, refit every cover, guard, and shield you removed earlier. Finally, reconnect the spark plug wire only after finishing assembly. Photographs help you replace drive belt routing exactly as the factory set it.
Test the Self-Propel Drive Belt
First, set the mower upright on clear, flat ground outdoors. Next, start the engine and let it idle briefly. Then, engage the drive control and watch wheel pull strength.
Also, walk slowly and check drive response on gentle slopes. If starting trouble appears later, learn how to fix the pull cord safely. However, stop immediately if you hear squealing or smell rubber.
Therefore, recheck routing and tension if drive feels weak. Also, clear debris from wheels and pulleys before retesting drive. Finally, mow a short strip and confirm consistent forward pull.
Frequently Asked Questions
Why does my self-propelled mower stop pulling itself?
Usually, a stretched, cracked, or broken drive belt stops wheel drive.
How do I know if my mower drive belt needs replacing?
You should replace belts showing cracks, glazing, fraying, slack, or squealing.
Can I replace a mower drive belt myself?
Yes, most owners replace typical belts using basic hand tools safely.
Which side should face up when tipping a mower?
You should always tip mowers with the air filter side up.
Why does my new belt still slip on the pulleys?
Often, wrong routing, weak tension, or worn pulleys cause continued slipping.
Conclusion
In summary, careful routing and tension checks restore reliable self-propel drive. Also, photos and manual checks prevent most common fitting mistakes. Therefore, inspect your belt today and replace worn belts promptly.
Finally, gather your tools and start your belt replacement now. Then, test the drive carefully before your next full mow. Consistent checks keep your mower pulling strongly all season long. Plan to replace drive belt wear items during the off season for zero downtime.



Leave a Reply