
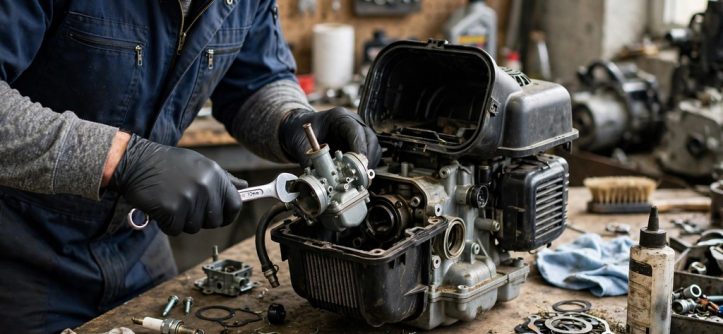
A clean lawn mower carburetor starts with removal, then clearing every jet and passage by hand. Then you inspect the gaskets and float needle before you reassemble and test it. This careful cleaning restores the steady air and fuel mixture.
Often, stale fuel leaves varnish that narrows tiny passages and starves the engine. For example, surging, stalling, and hard starting often point toward that buildup. However, you should confirm other simple causes before you remove this component.
Next, this guide covers only removal, cleaning, inspection, reassembly, and testing. Finally, patient bench work usually beats rushed spraying on the mower.
What You Need Before You Start
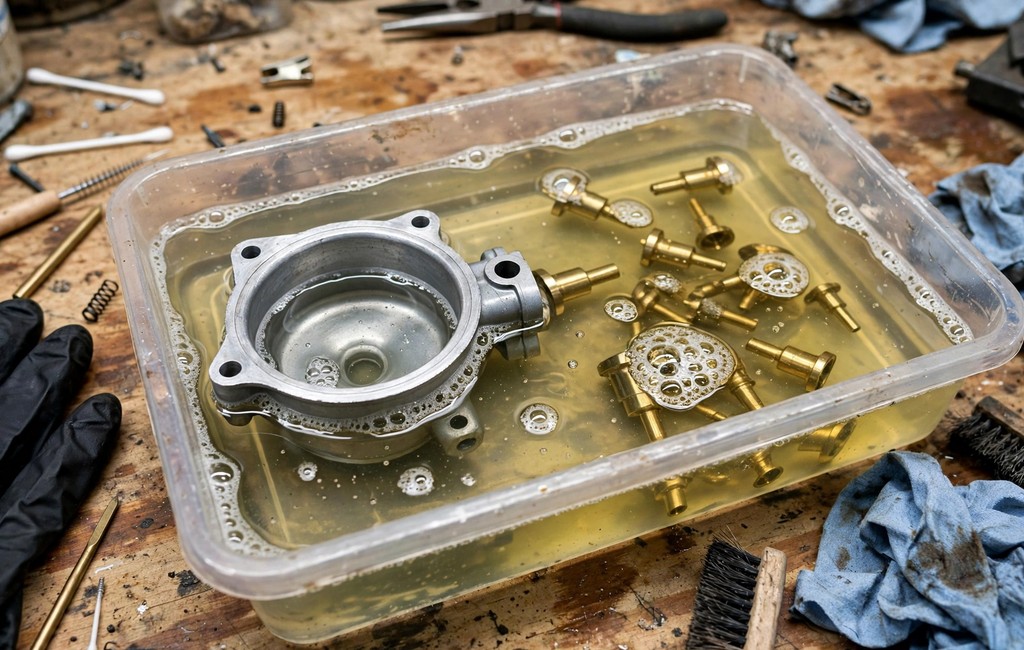
First, you gather tools before you touch any fastener on the mower. Also, a clean bench helps you track tiny jets, screws, and springs. Then you lay out a tray and label each small part carefully.
- Socket set and screwdrivers: Choose typical sizes and keep every fastener in a separate tray compartment.
- Carburetor cleaner and fine wire: Pick a dedicated cleaner and use only soft, fine wire strands.
- Compressed air and safety glasses: Blow passages gently and shield your eyes from every solvent splash.
- Approved fuel container and rags: Catch drained fuel safely and wipe spills before they spread further.
- Replacement gaskets and bowl O-ring: Match typical replacement parts to your manual before you order anything.
Additionally, manuals vary by model, so you confirm clearances and procedures first. Therefore, you never treat typical ranges or sizes as universal specifications.
How to Prepare the Mower Safely
First, you park the mower outdoors or inside a well ventilated area. Next, you work only on a cooled engine and disconnect the spark plug wire. Then you keep fuel away from ignition sources during every step.
Also, you close the fuel valve or clamp the fuel line gently. Meanwhile, you place an approved container under the bowl before draining anything. Finally, you wash solvent and fuel from your hands before testing.
How to Locate and Remove the Lawn Mower Carburetor
Finding the Lawn Mower Carburetor Behind the Air Filter
First, you remove the air filter cover and lift out the filter. Next, you find the carburetor body directly behind that filter housing. Also, you note the fuel line, throttle linkage, and choke linkage connections.
Still, separate lawn mower won’t start fixes cover checks beyond this single component. Additionally, broader lawn mower repair and maintenance habits help you prevent repeat clogging. Therefore, you focus this job entirely on the carburetor itself today.
Photographing and Disconnecting the Linkage
First, you photograph linkage and spring positions before you disconnect anything. Then you photograph each angle and keep every photo within easy reach. Also, you label springs and rods when two parts look very similar.
Next, you loosen the mounting bolts evenly and support the carburetor body. Then you slide the carburetor free and unhook each linkage rod carefully. Finally, you pull the fuel line free and plug it immediately.
Drain and Open the Carburetor to Clean Lawn Mower Parts
First, you hold the carburetor over your approved container or drain pan. Next, you loosen the drain screw or bowl bolt one slow turn. Then you let old fuel and sediment drain from the bowl completely.
Also, you inspect the drained fuel for water, grit, or dark varnish. Meanwhile, you remove the bowl and peel the bowl gasket free gently. Finally, you set the bowl aside on a clean lint free rag.
How to Clean Lawn Mower Carburetor Jets and Passages
First, you spray carburetor cleaner through every visible opening and passage. Next, you let the solvent soften varnish for several quiet minutes. Then you spray each passage again and watch the exit stream.
Also, you clean the carburetor throat and choke plate with a rag. Meanwhile, you wipe the outside body clean before you open internal passages. Then you keep removed parts in order across your clean bench.
Cleaning the Main Jet and Pilot Jet
First, you unscrew the main jet carefully with a properly fitting screwdriver. Also, you hold the jet toward light and inspect its tiny center hole. Next, you pass fine wire through the hole without forcing it wider. Finally, you spray the jet clean and set it aside separately.
Clearing Passages and the Emulsion Tube
First, you remove the pilot jet and emulsion tube where your design allows. Then you clear every side hole along the emulsion tube individually. Also, you blow compressed air through passages after each solvent spray. However, you never enlarge a calibrated hole with a drill bit. A full clean lawn mower carburetor service also reveals worn gaskets early.
How to Inspect Gaskets and the Float Needle
First, you pull the float pin and lift the float and needle out. Next, you inspect the float for cracks, fuel inside, or heavy discoloration. Also, you check the float needle tip for grooves or sticky residue.
- Bowl gasket and intake gaskets: Replace any gasket that shows cracks, flattening, or torn edges.
- Float needle and seat: Replace a needle that leaks or sticks during gentle movement tests.
- Float height and movement: Confirm the float swings freely and sits level per your manual.
- Bowl and body surfaces: Scrub away sediment and corrosion before you judge any sealing surface.
Therefore, you replace doubtful seals now instead of chasing leaks later. Meanwhile, you keep new gaskets dry and clean until final assembly. Many owners clean lawn mower carburetor parts once a season to prevent varnish.
How to Reassemble and Reinstall the Lawn Mower Carburetor
First, you reinstall the jets and snug them without excessive force. Next, you refit the float and needle and confirm free movement again. Then you seat the bowl gasket and raise the bowl straight upward.
Also, you tighten the bowl bolt evenly and avoid crushing the gasket. Next, you mount the carburetor and reconnect linkage from your photographs. Finally, you reconnect the fuel line and install the air filter assembly.
Test the Clean Lawn Mower Carburetor After Reassembly
First, you reconnect the spark plug wire and open the fuel valve. Next, you check the bowl, gasket, and fuel line for leaks. Then you start the engine outdoors and let it idle briefly.
Also, you test throttle response and listen for surging or hunting. Meanwhile, persistent trouble with a mower that dies while running points toward deeper checks. Therefore, you repeat the passage cleaning when symptoms stay exactly unchanged.
Also, you mow a short strip and confirm power under load. Next, you shut the engine down and recheck every connection once more. Working slowly helps you clean lawn mower carburetor passages without damaging brass.
Frequently Asked Questions
Can I clean a lawn mower carburetor without removing it?
However, spray cleaning reaches only light deposits and misses hidden passages inside.
How do I know if my lawn mower carburetor needs cleaning?
Typically, hard starting, surging, stalling, and rough idling signal clogged internal passages.
What dissolves varnish inside a lawn mower carburetor?
Specifically, carburetor cleaner dissolves varnish, gum, and stale fuel residue effectively.
Can I use wire to clean a carburetor jet?
Yes, you can pass fine wire gently without widening the calibrated hole.
Why does my mower still surge after carburetor cleaning?
Often, a missed passage, leaking gasket, or stale fuel causes continued surging.
Conclusion
Overall, careful cleaning restores fuel flow through jets, passages, and bowl. Then you gain smoother starting, steadier idling, and stronger throttle response. Finally, you protect the result with fresh fuel and regular filter care.
Now, you should gather your tools and clean your carburetor this weekend. Additionally, you should photograph every linkage before your first bolt turns. After you clean lawn mower carburetor internals, fresh fuel protects the work.


Leave a Reply