
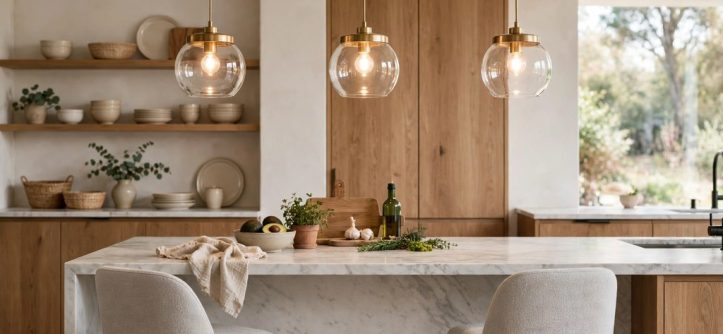
Kitchen light fixtures fall into four main families: pendants, recessed cans, under-cabinet lights, and flush mounts. Layered kitchen lighting combines these types across task, ambient, and accent roles for safe, attractive results. Good placement follows simple rules for height, spacing, and color temperature that anyone can apply.
Most kitchens feel dark because they rely on a single ceiling fixture. Consequently, corners stay shadowy while counters stay dim and hard to work on. Add under-cabinet lighting plus well-placed pendants, and the whole room transforms quickly.
This guide walks through every major fixture type, proven placement rules, and practical design guidance. You will learn proper pendant heights and recessed spacing rules. The color temperature section also covers food prep zones.
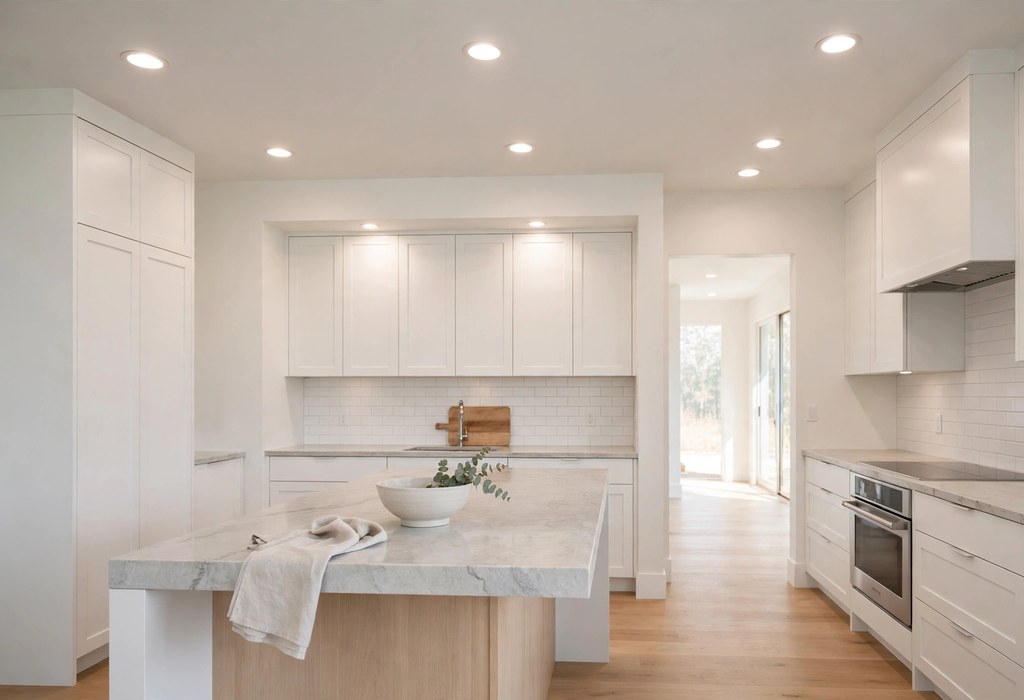
The Main Types of Kitchen Light Fixtures
Every kitchen fixture belongs to one of four broad families. For example, pendants hang from the ceiling and create focal points. Recessed lights sit inside the ceiling for clean, widespread illumination. Understanding each family helps you assign the right job to the right fixture.
Pendant Lights
Pendant lights hang from cords, rods, or chains and focus light downward. Additionally, designers often center them over a kitchen island or a breakfast bar. They also supply both task light and visual interest at the same time.
Glass pendants spread light in every direction and feel airy. Metal shades, in contrast, push light straight down onto the work surface. Fabric shades, however, soften the glow but need more distance from heat sources.
Size matters more than most buyers expect. In fact, small pendants over a large island look lost and underperform. Therefore, aim for a combined fixture width of one-half to two-thirds of the island length.
Notably, groupings create rhythm over long islands. Two pendants suit islands around four feet long. Three pendants balance islands of seven to nine feet. Additionally, space them 24 to 30 inches apart for even pools of light.
Adjustable rods or cords simplify height changes later. For deeper sizing and hanging guidance, read our guide to pendant lights over kitchen island. Finally, review it before you buy anything.
Mini pendants work well in tight kitchens and over peninsulas. Similarly, linear pendants span long islands with a single sleek fixture. Statement pendants, meanwhile, double as art and draw the eye immediately.
Shade opacity changes the light quality dramatically. For example, clear shades reveal the bulb and maximize brightness. Opal or frosted shades, in contrast, diffuse glare and flatter the whole room.
Choose the suspension type to match your ceiling. Cords suit casual kitchens and adjust easily. Additionally, rods give a tailored look and stay perfectly straight. Finally, chains add traditional character and adjust link by link.
Recessed Lighting
Recessed lighting hides inside the ceiling and delivers clean, modern illumination. The fixtures, often called can lights or downlights, also sit flush with the drywall. As a result, they provide excellent ambient light without crowding the ceiling plane.
Choose the housing size to match the job. Four-inch cans suit general kitchen illumination in standard ceilings. In addition, six-inch cans cover larger rooms with fewer fixtures. Two-inch gimbal lights, meanwhile, highlight glass cabinets or artwork.
LED retrofit trims upgrade older housings without rewiring. Specifically, they slide into existing cans and cut energy use dramatically. Most models also offer selectable color temperature for flexibility.
IC-rated housings touch insulation safely in attic ceilings. Non-IC housings, however, need clearance from insulation to prevent overheating. Therefore, always match the rating to your ceiling construction before installation.
Beam angle shapes how each can distributes light. Wide beams wash large areas with soft, overlapping cones. Narrow beams, in contrast, punch light into specific spots like a sink or cooktop. Finally, adjustable gimbal trims tilt the beam toward walls or counters.
Recessed cans alone can leave counter edges in shadow. Instead, pair them with under-cabinet fixtures for truly shadow-free prep zones. Our walkthrough of a recessed kitchen lighting layout shows exact spacing math for common ceiling heights.
Trim style affects the final look more than people realize. For instance, baffle trims reduce glare with ridged interiors. Reflector trims, in contrast, maximize brightness for high ceilings.
Pick the housing type for your project stage. New-construction housings mount to joists before drywall goes up. In contrast, remodel housings clip into existing ceilings through a cut hole. Both accept the same trims and LED modules.
Under Cabinet Lighting
Under cabinet lighting mounts beneath wall cabinets and lights the counter directly. Consequently, it eliminates the shadows that overhead fixtures always cast. No other fixture type improves prep visibility as dramatically.
Three main formats dominate this category. First, LED strips run continuously and deliver the most even wash of light. Next, puck lights create focused pools and suit small accent areas. Finally, light bars offer a slim, rigid option with strong, even output.
Mount the fixture toward the front edge of the cabinet. As a result, this position throws light across the full counter depth. Rear mounting, in contrast, leaves the front edge dark and wastes potential.
Choose hardwired models for a clean, permanent installation. Plug-in versions, however, install in minutes and suit renters well. Meanwhile, battery pucks handle closets or spots without nearby outlets.
A diffuser smooths LED strips and hides individual diodes. Specifically, opal covers reduce glare on polished stone counters. They also protect the strip from steam and cooking splatter.
For product comparisons and mounting diagrams, explore our deep dive on under cabinet kitchen lighting next. Indeed, it compares strips, pucks, and light bars side by side.
Link multiple runs to a single switch for convenience. As a result, one switch then controls the entire counter perimeter. This small wiring choice makes daily use far more pleasant.
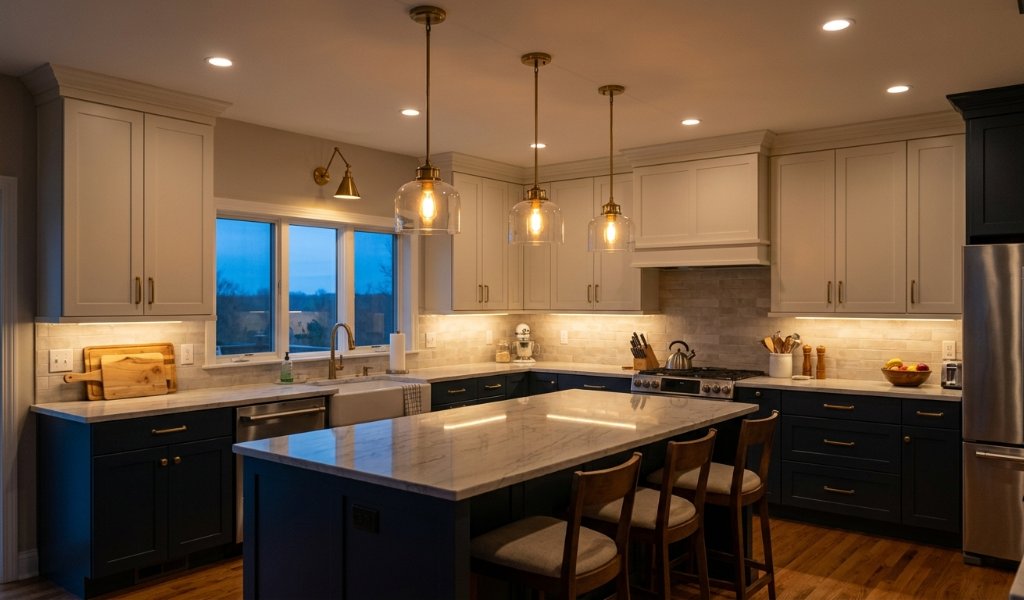
Flush Mount and Semi-Flush Mount Fixtures
Flush mount fixtures hug the ceiling and suit low or standard heights. Semi-flush mounts, in contrast, drop a few inches lower and add decorative presence. Both spread ambient light widely across the room.
These fixtures anchor the general lighting layer in many kitchens. They also work especially well in the center of the room. One central fixture plus perimeter task lights covers most layouts.
Choose shades wider than they are tall for the best spread. For example, disc and drum silhouettes distribute light evenly in all directions. Frosted glass softens brightness and reduces harsh glare.
Low ceilings demand special attention. Indeed, anything hanging below six inches crowds sightlines and feels oppressive. See our guide to lighting for small kitchens with low ceilings for tight-to-ceiling fixtures. Nevertheless, every option still looks stylish and bright.
Semi-flush mounts add sparkle without the bulk of a chandelier. Specifically, they suit transitional kitchens that blend classic and modern details. Install them on a dimmer to shift from bright prep to soft entertaining.
Statement Chandeliers
Additionally, chandeliers bring drama to kitchens with nine-foot or taller ceilings. Center one over the island or the breakfast table. They read more formal than pendants, so match them to the room style.
Size the chandelier to the surface below it. Specifically, keep its width under two-thirds of the island or table width. This proportion keeps the fixture grounded instead of overwhelming.
Hang the bottom 30 to 36 inches above the counter. As a result, this height preserves sightlines across the room. It also keeps the fixture clear of steam and splatter.
Pair the chandelier with recessed cans for real task light. However, decorative fixtures rarely deliver enough brightness alone. The cans handle work duty while the chandelier supplies character.
Match the chandelier metal to nearby hardware. For example, repeating the faucet finish ties the fixture into the room. Mixed metals still work when one finish clearly dominates.
Placement Principles That Make Kitchens Work
Great fixtures perform poorly when placed badly. In fact, height, spacing, and zone planning decide how light actually lands. Follow the rules below and your kitchen will look professionally designed.
Pendant Height and Spacing Over the Island
Hang pendants 30 to 36 inches above the island countertop. Measure from the counter surface to the bottom of the shade. As a result, this range lights the surface well without blocking sightlines.
Meanwhile, higher ceilings need slightly higher placement. Add about three inches for every foot above eight feet. A ten-foot ceiling, for example, usually calls for 36 to 42 inches of clearance.
Above all, keep the bottom edge above the eye level of tall users. Nobody should duck or peer around a shade while cooking. Adjustable rods make fine-tuning simple after installation.
Center the group on the island, not the room. Keep the outermost fixture at least six inches from each island end. As a result, even end margins make the arrangement look intentional and balanced.
First, two pendants divide a four-foot island into equal thirds. Next, three pendants divide longer islands into quarters. This simple math keeps spacing consistent and professional.
- Island under six feet: choose two medium pendants or one linear fixture.
- Island of seven to nine feet: hang three small pendants 24 to 30 inches apart.
- Island over nine feet: consider four pendants or a pair of linear fixtures.
Shade width also affects how low a pendant can hang. Wide shades catch the eye sooner and need a touch more clearance. Narrow shades, in contrast, disappear visually and tolerate lower positions.
Test the height with cardboard templates before drilling. Next, tape the templates at the planned height and live with them briefly. This quick mockup prevents expensive repositioning later.
Finally, consider sightlines from adjacent rooms too. Pendants visible from the living room become part of that view. Choose shapes that look attractive from every angle.
Recessed Light Spacing Rules
Space recessed cans four to six feet apart in most kitchens. Divide the ceiling height in feet by two for a quick estimate. Eight-foot ceilings therefore call for roughly four-foot spacing.
Keep cans 12 to 18 inches from the wall above counters. As a result, this distance washes light across the counter instead of the cabinet doors. Placing cans too close to the wall creates harsh scallops on the cabinets.
First, plan around work zones before filling walkways. Then mark the sink, range, and main prep areas. Finally, add cans to cover open floor space evenly.
Aim the beam at the front third of the counter. Light landing near the front edge reaches where hands actually work. In contrast, beams hitting the back wall leave the working zone in shadow.
Wider beam angles tolerate wider spacing between cans. Narrow beams, however, need tighter spacing to keep cones overlapping. Check the beam angle on the trim packaging before finalizing the grid.
- Four-inch cans: ideal for task zones and smaller kitchens.
- Five-inch cans: a flexible middle ground for general illumination.
- Six-inch cans: best for large kitchens with nine-foot or taller ceilings.
Avoid the cluttered Swiss-cheese look of too many cans. Fewer, better-placed fixtures always beat a crowded ceiling grid. Layer pendants and under-cabinet lights instead of adding more cans.
Sketch the grid on paper before the electrician arrives. Specifically, mark joists, vents, and plumbing that could block housings. A little planning prevents frustrating mid-installation surprises.
Finally, walk the finished grid mentally at night. Imagine standing at each work zone and checking for shadows. Adjust any can that leaves a dark corner behind.
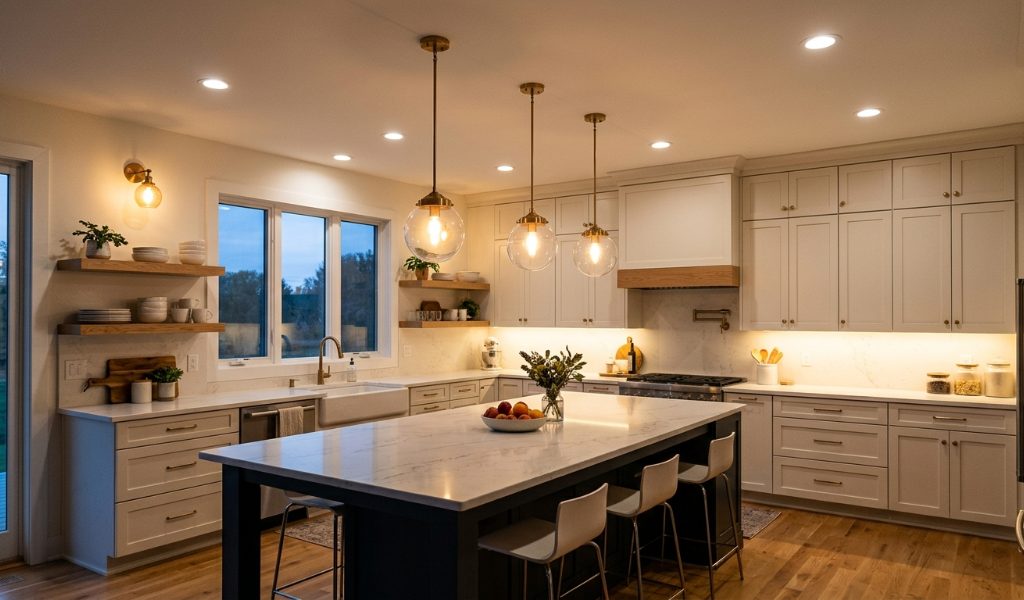
Plan by Kitchen Zone for Balanced Light
Divide the kitchen into zones: prep, cooking, cleanup, and gathering. Additionally, each zone needs its own task lighting plus shared ambient light. Zone planning prevents the single-bright-spot problem entirely.
Prep zones need the brightest, most shadow-free light. Combine under-cabinet strips with a nearby recessed can. As a result, this pairing puts light on the cutting board from two directions.
The cooking zone centers on the range or cooktop. A range hood light handles most of this task directly. Additionally, add a recessed can in front of the range for spillover coverage.
The cleanup zone sits at the sink and dishwasher. A dedicated recessed light or small pendant serves this spot well. As a result, bright, accurate light here makes dishes and produce inspection easy.
Gathering zones include islands and breakfast nooks. Softer, dimmable pendants create a welcoming mood after cooking ends. Consequently, a separate dimmer lets this zone shift from work to relaxation instantly.
Tie the zones together with layered kitchen lighting so no area feels disconnected from the rest. Additionally, consistent color temperature across zones keeps the whole kitchen unified. Finally, walk the room at night and adjust any zone that feels dim.
Similarly, small kitchens need the same zone thinking. Assign one fixture per zone even in compact layouts. Mini pendants and slim strips fit where full-size fixtures cannot.
Open-plan kitchens share light with living spaces. Keep the kitchen slightly brighter than the adjoining room. As a result, this contrast naturally draws people toward the gathering zone.
Light the pantry like a work zone. For instance, a bright ceiling fixture plus door-triggered strips ends dark corners. You will find ingredients faster and waste less food.
Design Guidance for Color, Brightness, and Style
Technical choices shape how the kitchen feels as much as fixture shapes do. Indeed, color temperature, brightness, and finish coordination deserve equal attention. Get these right and even modest fixtures look expensive.
Color Temperature Basics
Color temperature measures how warm or cool light appears. Manufacturers, in fact, express it in Kelvin, written as K. Lower numbers look warm and golden; higher numbers look cool and bluish.
Kitchens generally shine at 2700K to 3000K. This warm-white range flatters wood tones and human skin. It also makes food look fresh and appetizing.
Task-heavy zones can rise to 3500K for extra crispness. Specifically, under-cabinet strips at this level sharpen detail on cutting boards. Avoid jumping above 4000K anywhere people relax or eat.
Match the Kelvin rating across every fixture in the kitchen. Otherwise, mixed temperatures create a subtly sickly, mismatched look. Write your chosen number inside the electrical panel for future bulb purchases.
Warm-dim LEDs shift warmer as they dim, like old incandescents. Standard LEDs, in contrast, hold the same color at every dim level. Pick warm-dim models for dining zones and standard LEDs for work zones.
- 2700K: warm and cozy, ideal for pendants over islands and breakfast nooks.
- 3000K: soft white and crisp, the most popular all-around kitchen choice.
- 3500K: neutral and bright, useful for dedicated task lighting only.
- 4000K and above: clinical and cool, better suited to garages than kitchens.
For charts and room-by-room advice, see our full guide to kitchen lighting color temperature. Review it before finalizing any bulb order. Specifically, it explains how Kelvin interacts with cabinet finishes and paint colors.
First, test bulbs at night before committing to a whole kitchen. Daylight skews your perception of warmth dramatically. Then buy two or three options and compare them after dark.
Test color temperature against your cabinet finish. For example, warm wood deepens beautifully under 2700K light. White cabinets stay crisp and clean at 3000K. Gray cabinets can turn flat under overly warm bulbs.
Lumens, CRI, and Beam Angle
Lumens measure brightness; more lumens mean more light output. Watts, however, measure energy use, not brightness, in the LED era. Always compare fixtures by lumens, never by watts.
Kitchens need generous brightness for safe food prep. For example, plan roughly 600 to 900 lumens per recessed downlight. Pendants over an island typically need 300 to 1000 lumens each.
CRI measures how accurately light renders colors. The scale runs to 100, and higher numbers show truer colors. Therefore, choose a CRI of 90 or above for any kitchen fixture.
High CRI reveals the true red of tomatoes and the green of herbs. In contrast, low CRI washes produce out and makes judging doneness harder. The price difference is small, so never settle below 90.
Beam angle controls how widely a fixture spreads its lumens. Wide angles flood general areas with soft light. Narrow angles, in contrast, concentrate brightness on specific targets. Finally, match the angle to the zone: wide for ambient, narrow for accents.
Total the lumens across all layers, not just one fixture. In fact, a kitchen often needs 5,000 to 10,000 lumens in total. Distribute that total so no single zone carries the whole load.
Accent Lighting That Adds Depth
Accent lighting highlights what makes your kitchen special. For instance, it draws the eye to glass cabinets, art, or textured backsplashes. This layer adds the depth that flat lighting always lacks.
Install LED strips inside glass-front cabinets. As a result, they turn dishware into a glowing display after dark. Choose warm 2700K strips to keep the effect cozy.
Wash the backsplash with a dedicated strip or puck row. Indeed, textured tile and stone look dramatically better under grazing light. This trick makes even budget tile look expensive.
Toe-kick lighting adds a floating effect under base cabinets. It also works as a gentle night light for midnight trips. Use a damp-rated strip and give it a separate low dimmer.
Picture lights above open shelves spotlight cookbooks and ceramics. Additionally, they add gallery polish to everyday storage. Battery models install without any wiring at all.
Keep accent brightness below the task layer. Accents should whisper while task lights speak clearly. As a result, this hierarchy keeps the kitchen functional first and pretty second.
Match Styles and Finishes Across the Kitchen
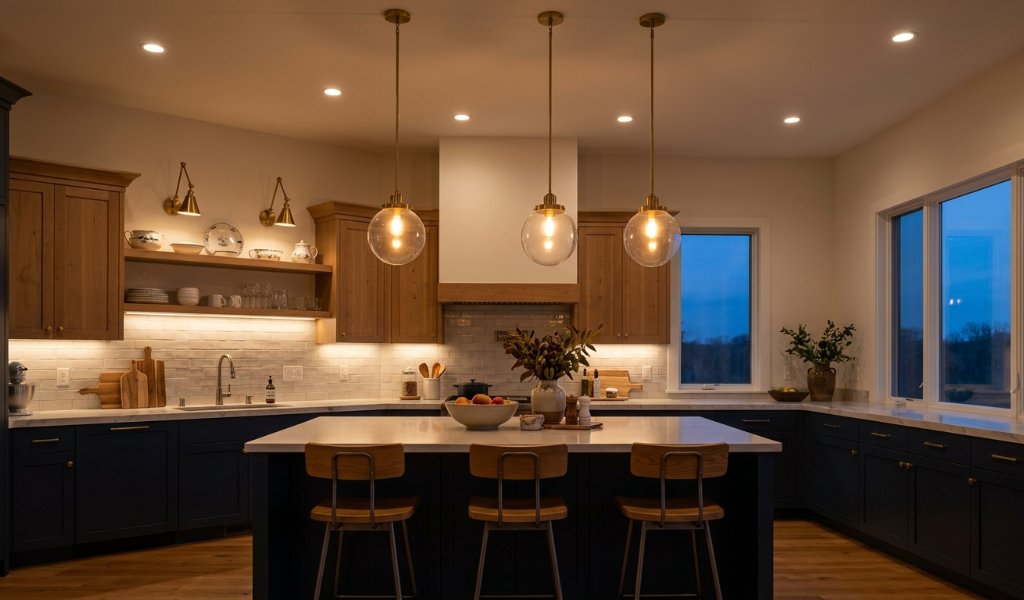
Fixtures should echo the kitchen’s overall design language. For example, modern kitchens suit clean lines, glass, and matte black metal. Traditional kitchens, in contrast, welcome brass, seeded glass, and lantern shapes.
Farmhouse kitchens favor blackened steel, wood accents, and simple silhouettes. Meanwhile, transitional kitchens blend both worlds with brushed nickel and soft curves. Pick one style direction and commit to it fully.
Finishes do not need to match exactly. Instead, a popular rule keeps one dominant finish on 70 percent of visible metal. Use a second finish for the remaining 30 percent of accents.
Matte black bridges almost any faucet or hardware finish. Similarly, polished nickel reads as a neutral and warms cool palettes. Brass and champagne tones pair beautifully with warm wood cabinets.
Browse our roundup of popular kitchen lighting styles to see these combinations in real kitchens. Specifically, it covers modern, traditional, farmhouse, industrial, and transitional looks. Save the images that match your vision before shopping.
Repeat one material in at least two fixtures. Repetition creates cohesion without strict matching. A brass pendant and a brass faucet, for instance, tie the room together.
Dimmers and Layered Control
A dimmer transforms one fixture into many moods. For example, bright light speeds up chopping and cleanup. In contrast, low light softens the room for late-night snacks or entertaining.
Put every lighting layer on its own dimmer switch. As a result, separate controls let task, ambient, and accent layers work independently. This flexibility defines truly professional kitchen lighting.
Match the dimmer to the LED driver technology. Otherwise, mismatched dimmers cause flicker, buzzing, or limited range. Buy dimmer and fixtures as a tested pair whenever possible.
Smart dimmers add scenes, schedules, and voice control. For instance, program a bright cooking scene and a soft evening scene. Guests notice the polish even when they cannot name it.
Dimmer switches cost little yet deliver the biggest mood upgrade per dollar. Therefore, install them during any fixture swap for maximum value. Your future self will thank you at every dinner party.
Finally, label each dimmer clearly at the switch plate. Guests should find the right layer without guessing. Small labels prevent the all-lights-blazing dinner party.
Installation and Safety Basics
Good lighting plans respect electrical codes and product ratings. Indeed, these fundamentals keep your project safe and inspection-ready. Always hire a licensed electrician for new circuits or panel work.
Ratings, Boxes, and Wiring Choices
First, check every fixture rating before buying. Damp-rated fixtures handle steam and humidity near sinks and ranges. In contrast, wet-rated models belong only in truly exposed outdoor locations.
Confirm IC-rated housings where insulation touches the ceiling. Non-IC housings, however, need several inches of clearance around them. Using the wrong rating creates a genuine fire hazard.
Every ceiling fixture needs a properly secured junction box. Specifically, heavy pendants and chandeliers need boxes rated for their weight. Never hang a heavy fixture from drywall alone.
Hardwired fixtures connect directly to house wiring for a permanent look. Plug-in models, in contrast, offer easy installation without opening walls. Choose hardwired for renovations and plug-in for quick upgrades.
Our complete overview of kitchen lighting installation safety covers codes, clearances, and GFCI requirements in plain language. Therefore, review it before any DIY work begins. When in doubt, call a licensed electrician without hesitation.
Above all, turn off the breaker before touching any wiring. Test the wires with a non-contact tester before handling them. This habit takes seconds and prevents serious shocks.
Keep fixture screws and mounting hardware organized during installs. For example, a small tray prevents lost parts and wobbly fixtures. Patience during mounting pays off in a rock-solid result.
Keep Your Kitchen Lighting Energy Efficient
Kitchens run their lights more hours than any other room. Efficient choices therefore pay back faster here than anywhere else. Small upgrades compound into real savings over a year.
Smart Choices That Cut Power Use
Switch every bulb to LED without exception. In fact, LEDs use roughly 75 percent less energy than old incandescents. They also last 15 to 25 times longer, which cuts replacement hassle.
Dimmers save energy every time you lower the lights. A fixture at half brightness uses far less than half power. Therefore, dim the ambient layer whenever full task brightness is unnecessary.
Motion sensors suit pantries and other pass-through spaces. As a result, they switch lights off when nobody is around. This simple device ends the forgotten-light problem permanently.
Our guide to energy efficient kitchen lighting compares LED formats, controls, and payback math in depth. It also explains ENERGY STAR ratings and utility rebate programs. Start there before replacing a whole kitchen of fixtures.
Choose fixtures with replaceable LED modules or standard sockets. However, integrated LEDs trap you when the driver eventually fails. Serviceable designs extend the fixture’s useful life for years.
Clean fixtures regularly to maintain full brightness. In fact, dust and grease quietly steal a surprising amount of light. A clean fixture often outperforms a brighter dirty one.
Common Kitchen Lighting Mistakes to Avoid
Most lighting regrets trace back to a handful of avoidable errors. Learn them now, and consequently your plan will sidestep every one.
First, relying on a single ceiling fixture tops the list. One central light always leaves counters and corners in shadow. Layer at least two fixture types in every kitchen.
Hanging pendants too low creates daily frustration. Indeed, shades at face height block conversation and bump heads. Respect the 30 to 36 inch rule above every counter.
Mixing color temperatures looks subtly wrong. For example, one cool bulb among warm ones ruins the whole effect. Standardize on a single Kelvin number for the entire kitchen.
Skipping dimmers wastes the biggest mood upgrade available. Indeed, full-bright lighting feels harsh during evening gatherings. Add a dimmer to every layer from the start.
Ignoring the junction box rating risks a falling fixture. Heavy pendants need boxes rated for their exact weight. Therefore, confirm the rating before the electrician leaves.
Forgetting accent lighting leaves the kitchen feeling flat. Otherwise, task and ambient layers alone create a purely utilitarian room. Add one accent element for depth and personality.
Buying fixtures before finalizing the layout causes mismatches. Island length, ceiling height, and cabinet runs dictate sizing. Measure first, shop second, and install last.
Frequently Asked Questions
How many lumens does a kitchen need?
Most kitchens need 5,000 to 10,000 total lumens across task, ambient, and accent layers.
What color temperature is best for kitchen lighting?
Warm white at 2700K to 3000K suits most kitchens, while 3500K sharpens dedicated task zones.
How far apart should recessed lights be in a kitchen?
Space recessed cans four to six feet apart and 12 to 18 inches from wall cabinets.
Do kitchen pendants and recessed lights need separate dimmers?
Yes, give pendants, recessed cans, and under-cabinet lights separate dimmers for independent layer control.
Can I mix metal finishes on kitchen light fixtures?
Yes, keep one dominant finish on 70 percent of visible metal and a second finish for accents.
Bringing Your Kitchen Lighting Plan Together
Start with the three layers: ambient, task, and accent. For instance, assign recessed cans or flush mounts to ambient duty. Give under-cabinet lights and pendants the task roles.
Next, apply the placement rules from this guide. Hang pendants 30 to 36 inches above the island. Space recessed cans four to six feet apart and 12 to 18 inches from walls.
Finish with consistent 2700K to 3000K color temperature and a high CRI. Additionally, add a dimmer to every layer for total control. Learn how to clean kitchen light fixtures so dust and grease never dim your results.
Ready to plan your kitchen? First, sketch your zones, list your fixtures, and shop with this guide open. Great lighting rewards you every single day you cook.
Finally, revisit your plan once fixtures arrive. Hold each shade at its planned height and check the spread. Indeed, small adjustments now prevent big regrets later.

Leave a Reply