

Turn off the breaker before you clean any kitchen light fixture. Let bulbs and housings cool completely before you touch anything. Polish fixtures with a microfiber cloth, then wash glass shades in warm soapy water and dry fully.
Kitchen fixtures collect grease, steam, and dust faster than lights in other rooms. Dirty glass and diffusers cut lumens noticeably, so task lighting often feels dim. Fortunately, most maintenance takes only basic supplies and a few minutes.
This guide walks through each fixture type, safe cleaning methods, and a simple schedule. You will also learn when manufacturer instructions call for extra care. Rely on it to keep pendant lights, recessed lighting, and under cabinet lighting bright and efficient.
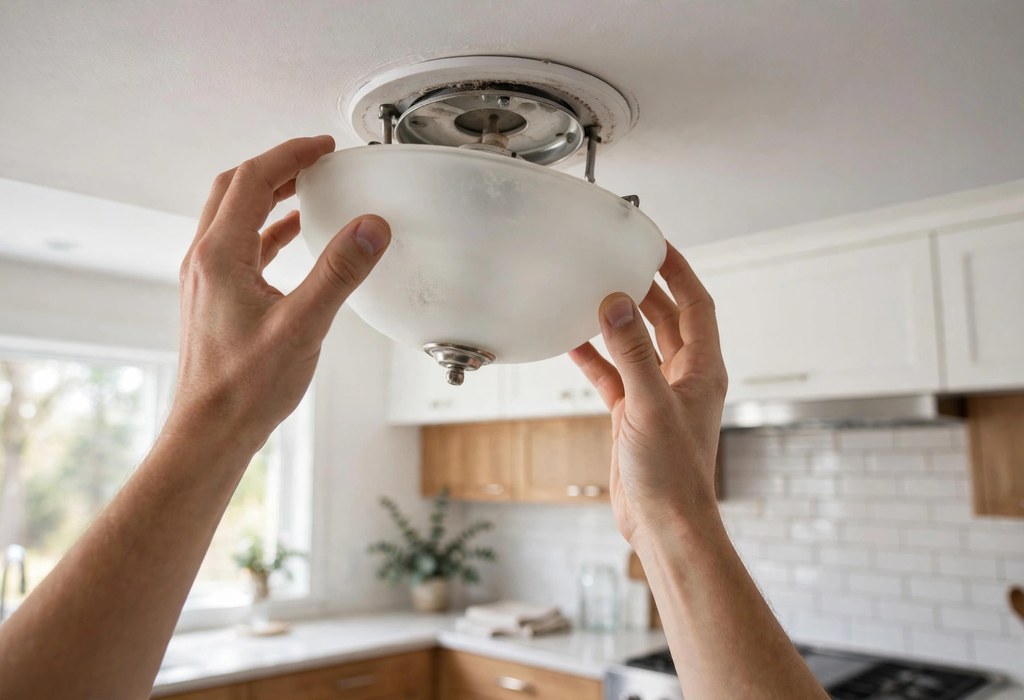
Safety First: Isolate Power Before You Clean
Always switch off the breaker, not just the wall switch. Wall switches can fail silently or get bumped accidentally. First, wait until bulbs, diffusers, and housings feel fully cool to touch.
Some finishes lose warranty protection when harsh chemicals touch them, so check manufacturer instructions first. Our kitchen light fixtures guide also explains which common fixture types tolerate damp cleaning. Integrated LED units especially warn against solvents near their drivers.
Clean Glass Shades and Globes
Start every cleaning with a dry microfiber cloth to lift loose dust. Dry wiping alone smears kitchen grease, so switch to a damp cloth next. Then, mix a few drops of mild dish soap in warm water. Wipe inside and outside of each shade, then dry immediately with a second cloth.
When fittings allow easy release, remove shades for a deeper wash instead. Support the glass with one hand while loosening thumbscrews or retaining rings. Next, wash the shades in the sink, rinse thoroughly, and air dry fully before reinstalling. Never use abrasive pads on frosted or etched glass.
Maintain Metal Finishes and Hardware
Remove loose dust from metal frames and canopies with a soft dry cloth. Afterward, wipe chrome and nickel with a cloth barely dampened with warm water. For brass, use only plain warm water since acids strip lacquer coatings. Buff gently with a dry cloth to restore the original shine.
Leave antique or patina finishes alone except for light dusting. Cleaning solutions remove the character these finishes intentionally carry. Additionally, check screws and mounting hardware while you clean. Tighten anything loose so fixtures stay secure overhead.
Care for Diffusers, LED Strips, and Puck Lights
Diffusers scatter light evenly, yet greasy film ruins their output quickly. Gently wipe plastic diffusers with a barely damp microfiber cloth. Avoid soaking multi-layer diffusers because moisture can warp their seals. Treat puck light lenses the same gentle way.
With LED strips and light bars, cut power first, then wipe with a dry cloth. Dampen the cloth only for stubborn grease, and avoid spraying liquid directly. Keep cleaners away from adhesive backings so strips stay firmly mounted. The method suits both plug-in and hardwired under cabinet lighting installations.
Keep Fixtures Bright and Efficient
Clean fixtures produce more lumens, so regular care reduces energy waste. Grease and dust act like a thermal blanket and shorten LED life. Match bulbs to a compatible dimmer to prevent flicker and early failure. These maintenance habits pair well with our energy efficient kitchen lighting.
Note each bulb’s Kelvin rating before replacing anything. Color temperature should stay consistent across task lighting and ambient lighting. Check CRI too, because strong color rendering keeps food looking natural. Finally, confirm the beam angle suits your kitchen island layout.
Maintain Recessed, Flush Mount, and Semi-Flush Mount Fixtures
Brush recessed lighting trims with a dry microfiber cloth every month. Clear the lens gently and check that sealing rings sit flat. On flush mount and semi-flush mount fixtures, remove the dome or cover carefully. Wash glass domes in warm soapy water and dry completely before reattaching.
Vacuum inside the housing with a soft brush attachment when accessible. Trapped dust inside cans holds heat and strains the driver. Skip oversized bulbs in enclosed housings because trapped heat shortens LED life. Near sinks, choose damp-rated fixtures and inspect their gaskets for cracks.
Build a Maintenance Schedule
Small, regular habits beat one annual deep clean every time. Weekly dusting stops grease from baking into sticky layers. Meanwhile, quarterly checks catch loose parts and flicker early. Write the schedule on your calendar so maintenance actually happens.
- Every week: dust pendant lights, glass shades, and exposed bulbs with a dry microfiber cloth.
- Monthly: wash removable shades, wipe under cabinet lighting, and inspect cords and canopies.
- Quarterly: clean diffusers, tighten screws, and test dimmer smoothness across every zone.
- Twice yearly: wash domes, check junction box covers, and confirm IC-rated labels near insulation.
When to Call an Electrician
Stop cleaning and call a professional if you see exposed wiring or scorch marks. A loose canopy or buzzing dimmer signals trouble inside the junction box. Water stains inside a diffuser may mean a failed damp-rated seal. Such problems sit beyond normal homeowner maintenance.
An electrician can also verify IC-rated recessed housings where insulation touches the can. Non-IC fixtures buried in insulation create real fire hazards. Similarly, flickering accent lighting may need a compatible dimmer installed. Professional help protects both your home and your warranty.
Frequently Asked Questions
How Often Should You Clean Kitchen Light Fixtures?
Dust fixtures weekly and deep clean monthly, since kitchen grease builds up faster than in other rooms.
Can You Use Vinegar to Clean Light Fixtures?
Yes, diluted white vinegar cuts grease on glass, but skip it on brass and lacquered finishes.
Should You Turn Off the Power Before Cleaning Light Fixtures?
Absolutely, switch off the breaker and let everything cool before touching any fixture or bulb.
How Do You Clean Greasy Pendant Lights Over a Kitchen Island?
Scrub the shade inside and out with warm soapy water, then polish dry for a streak-free finish.
Can You Clean LED Strips with Water?
Use a dry cloth on LED strips, dampening it only slightly for stubborn grease spots.
Keep Your Kitchen Lighting Bright Longer
Spotless fixtures deliver stronger task lighting, better ambient lighting, and longer LED life. Just a few minutes of weekly dusting protects your investment beautifully. Stick to gentle products and always follow manufacturer cleaning instructions.
Begin with the dustiest fixture in your kitchen today. Work through the schedule above at your own pace. Results show the moment the lights switch back on.



Leave a Reply