
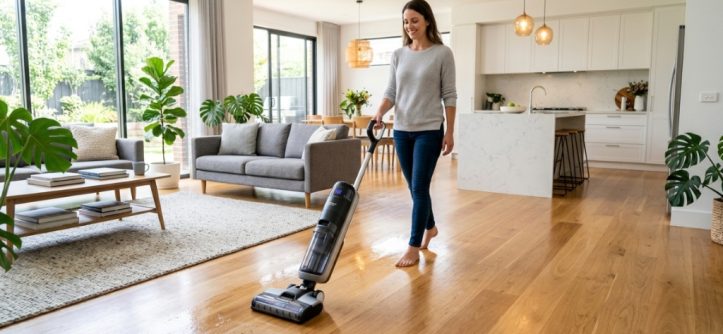
You know that feeling when you drop a full glass of juice, and the liquid spreads across the kitchen floor like a tiny flood? Or maybe you are staring at a garage floor that looks like it hasn’t seen a mop since the last decade. The typical mop and bucket approach often just pushes dirty water around, leaving a grimy film behind. You need a real solution. That’s where a wet/dry vacuum changes the game. You can stop fighting with puddles, dust, and debris. Instead of spending hours scrubbing, you can pull out a machine that sucks up liquid messes in seconds and leaves your hard floors spotless. In this guide, I’ll share professional wet/dry vacuum cleaning tips that will save you time and deliver results you never thought possible with a single tool.
What Makes a Wet Dry Vacuum Different from a Regular Vacuum?
A wet/dry vacuum is built to handle both liquid spills and dry debris without damaging the motor. Unlike a standard vacuum cleaner that can short-circuit or clog if it sucks up water, a wet/dry vacuum uses a special separator tank and a sealed motor to safely collect wet messes.
Core Design Differences
- Separate collection tank: The motor sits above the collection area, so liquids never reach the electrical components.
- Replaceable filters: Wet jobs require a foam filter; dry jobs use a paper filter or cartridge. You swap them based on the task.
- Durable construction: Most models have stainless steel or heavy-duty plastic tanks that resist rust and impact.
- Powerful suction: These machines typically produce stronger airflow than home vacuums, making them effective for workshop dust and large spills.
When Should You Use a Wet/Dry Vacuum Instead of a Mop?
A mop works fine for light maintenance cleaning, but it fails on thick mud, flooded basements, or sticky substances like soda or paint. A wet dry vacuum excels when you need to extract liquid quickly, remove semi-solid messes, or clean surfaces that a mop would just smear.
How Do You Prepare a Wet/Dry Vacuum for Floor Cleaning?
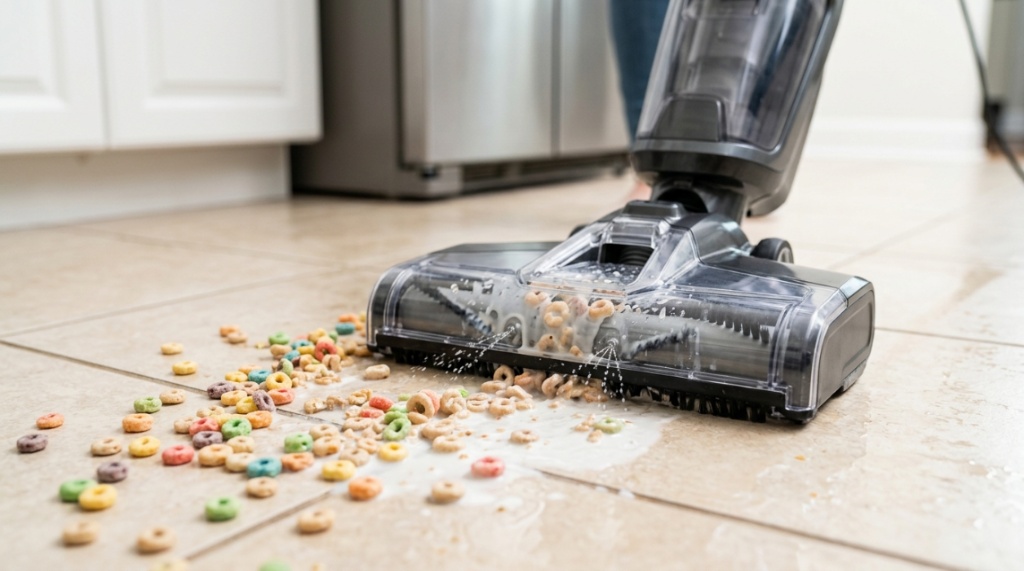
Preparation is the step most people skip, but it determines whether your floor ends up clean or just damp. Before you touch the power switch, you need to check two things: the filter and the tank.
Selecting the Right Filter for Your Task
For wet pickups, always remove the paper filter bag and the HEPA filter. Install a dedicated foam filter or a rubber float filter. Paper filters will disintegrate when wet, ruining your machine and potentially blowing dust back into the air. For dry pickups, use a pleated cartridge filter or a disposable bag to trap fine particles.
Checking the Tank and Hose for Blockages
Inspect the interior of the tank for any debris left from a previous job. A small screw or piece of plastic can rattle around and damage the impeller. Also, run your hand along the hose to feel for clogs. A blocked hose reduces suction power by up to 80 percent.
Setting Up the Correct Attachments
For smooth floors like tile, vinyl, or hardwood, use the squeegee floor attachment. This tool has a rubber blade that wicks water into the suction path. For carpets, switch to the crevice tool or a turbo brush to lift moisture from deep fibers.
What Is the Best Technique for Wet Floor Cleaning?
The secret to professional results is controlled movement and overlapping passes. You do not just point the nozzle and hope for the best. You need a systematic pattern that ensures no area gets missed.
The Overlap Method
Start at the farthest corner of the room and pull the floor nozzle toward you in a straight line. Overlap each pass by about 50 percent. This prevents streaks and ensures you collect all the water in one go. If you are cleaning a large spill, work from the outside edge inward to avoid spreading the liquid.
Managing Large Puddles
For a flooded floor, do not try to suck up the entire puddle at once. Lift the nozzle slightly off the surface to allow the vacuum to pull air and water together. This prevents the machine from overloading and reduces the risk of the float valve activating prematurely.
Emptying the Tank Mid-Job
Most wet/dry vacuums have a maximum liquid capacity of around 6 to 10 gallons. Once the tank reaches capacity, a float valve shuts off suction automatically. Stop, remove the drain plug or tip the tank into a utility sink, and continue. Never let the tank overflow into the motor housing.
How Can You Clean Different Floor Types Without Damage?
Not all floors respond the same way to water and suction. What works on ceramic tile can ruin engineered hardwood. You need to adapt your technique based on the flooring material.
Ceramic and Porcelain Tile
Tile is the most forgiving surface. You can use full suction and the squeegee attachment. The main risk is grout damage if you use a stiff brush attachment. Stick to the rubber squeegee, and avoid leaving standing water on the grout lines for more than a few minutes.
Vinyl and Linoleum
These surfaces are waterproof, but they can warp if moisture seeps under the edges. Use the squeegee tool, and keep the vacuum moving. Do not let water pool near baseboards or seams. After cleaning, run the vacuum over the edges of the room to extract moisture from corners.
Hardwood and Laminate
Hardwood and laminate are sensitive to excess moisture. You can use a wet/dry vacuum, but you must minimize contact time. Use the squeegee attachment on a low-suction setting if your machine has a variable speed control. Immediately after extraction, dry the floor with a microfiber cloth to prevent water absorption.
Concrete and Garage Floors
Concrete is highly porous and can hold dirt deep in its surface. Pre-wet the floor with a mild degreaser, scrub with a stiff brush, and then extract the liquid with the squeegee tool. For oil stains, use an absorbent powder first, then vacuum up the residue dry before switching to wet mode. Choosing the right equipment makes all the difference when tackling stubborn stains or post-renovation messes. If you are upgrading your setup or looking for heavy-duty cleanup power beyond standard household tools, check out our guide on finding Affordable Vacuum Sealers in Texas to see what commercial-grade options fit your workspace and budget.
Which wet/dry vacuum attachments give professional results?
Most wet/dry vacuums come with a standard set of attachments, but using the wrong one can make a simple job frustrating. Knowing which tool to grab for each task will speed up your cleaning and improve results.
Essential Attachments for Floor Cleaning
| Attachment | Best Use | Why It Works |
|---|---|---|
| Squeegee floor nozzle | Wet floors (tile, concrete, vinyl) | The rubber blade removes water without scratching |
| Crevice tool | Edges, corners, baseboards | A narrow slot reaches tight spaces |
| Foam filter | All wet pickups | Allows water to pass while blocking debris |
| Utility brush | Scrubbing stubborn stains | Agitates dirt before extraction |
Using the Squeegee Attachment Correctly
Angle the nozzle so the rubber blade makes full contact with the floor. Pull toward you at a steady pace. If the squeegee skips or chatters, you are moving too fast. Slow down to maintain constant contact.
When to Use the Crevice Tool
After you finish the main floor area, switch to the crevice tool for the perimeter. Run it along baseboards, under cabinets, and around door frames. These spots collect water that your floor nozzle cannot reach.
How Do You Maintain a Wet/Dry Vacuum for Longevity?
A neglected wet/dry vacuum loses suction, smells bad, and can even grow mold inside the tank. Regular maintenance takes just a few minutes but extends the life of the machine significantly.
Cleaning the Tank After Every Wet Job
Empty the tank completely. Rinse the interior with a hose or in a utility sink. Add a few drops of dish soap and scrub with a soft sponge. Rinse again until no soap residue remains. Leave the tank open to air dry for at least one hour before storing.
Drying and Replacing Filters
Foam filters should be washed with warm soapy water, rinsed thoroughly, and air dried completely. Never reinstall a damp filter because mold will grow. Paper cartridge filters can be tapped clean over a trash can, but replace them every three months or when they appear torn.
Inspecting the Hose and Gaskets
Check the hose for cracks or leaks. Small holes reduce suction and allow dust to escape. Also, inspect the rubber gasket around the tank lid. If it is compressed or cracked, replace it to maintain an airtight seal.
Can You Use a Wet/Dry Vacuum to Clean Carpets and Rugs?
Yes, but with caution. A standard wet/dry vacuum is not a dedicated carpet extractor, but it can handle surface spills and light refreshing cleaning. The key is controlling the amount of liquid you introduce and extracting it quickly.
Spot Cleaning Carpet Stains
Blot the stain with a clean cloth to absorb excess liquid. Spray a carpet cleaning solution onto the stain and let it sit for three to five minutes. Use the squeegee attachment or a crevice tool to extract the moisture. Keep the nozzle moving to avoid saturating the carpet backing.
Full Carpet Refresh (Gentle Method)
Mix a solution of warm water and white vinegar (1:10 ratio). Lightly mist the carpet with a spray bottle, but do not soak it. Immediately vacuum over the area with the squeegee attachment. This method removes light odors and freshens the fibers without deep saturation.
Important Limitations
Do not use a wet-dry vacuum on thick shag carpets or high-pile rugs because the rubber blade can snag fibers. Also, never leave the vacuum stationary on carpet while it is running because the suction can damage the carpet pile.
What Safety Precautions Should You Follow?
Water and electricity create serious hazards. A wet/dry vacuum is designed to handle water safely, but operator error can still lead to injury. Follow these guidelines every time you clean.
Electrical Safety First
Always plug the vacuum into a GFCI (Ground Fault Circuit Interrupter) outlet. If you are working in a wet area like a basement or garage, use a heavy-duty extension cord rated for outdoor use. Keep the cord away from standing water.
Never Mix Chemicals in the Tank
Do not pour bleach, solvents, or flammable liquids into the tank. Some chemicals react with the plastic or metal components and produce toxic fumes. Use only water-compatible cleaning solutions, and always rinse the tank afterward.
Proper Disposal of Collected Liquids
Dispose of dirty water in a utility sink or toilet. Do not pour it down a storm drain or onto the lawn. If the liquid contains cleaning chemicals, check local regulations for proper disposal methods.
How Do You Dry Floors Faster After Wet Vacuuming?
Even with a powerful wet/dry vacuum, some moisture remains on the surface. Speeding up the drying process prevents slips, water spots, and mold growth.
Use a Microfiber Mop After Extraction
After you finish vacuuming, go over the floor with a dry microfiber mop. The microfiber absorbs residual moisture that the vacuum left behind. This step is especially important on hardwood or laminate floors.
Increase Airflow in the Room
Open windows and doors to create cross-ventilation. Set up a box fan or a floor fan directed at the wet areas. Air movement dramatically reduces drying time from hours to minutes.
Run the vacuum in reverse (if equipped).
Some wet/dry vacuums have a reverse or blower function. Switch to blower mode and direct the air outlet toward the wet floor. This circulates warm air across the surface and speeds evaporation.
What Are Common Mistakes People Make with Wet Dry Vacuums?
Even experienced users fall into a few predictable traps. Avoiding these mistakes will save you time, money, and frustration.
Using the Wrong Filter for Wet Jobs
Leaving a paper filter in place during wet pickup is the number one cause of damage. The paper disintegrates, clogs the motor, and voids the warranty. Always swap to a foam filter before vacuuming liquids.
Ignoring the Float Valve
When the tank is full, the float valve blocks suction. Some users ignore the sound and keep pushing the vacuum, which forces water past the seal. Stop immediately, empty the tank, and reset the float.
Skipping Post-Cleaning Maintenance
Storing a wet-dry vacuum with water sitting in the tank leads to foul odors and bacterial growth. Always empty, rinse, and dry the tank before putting the machine away. A few extra minutes now prevents a smelly mess later.
When Should You Upgrade to a More Powerful Wet/Dry Vacuum?
If your current machine struggles with large spills, loses suction quickly, or lacks the attachments you need, it may be time for an upgrade. A better model will make floor cleaning faster and more effective.
Signs You Need a New Machine
- You notice a burning smell during operation (indicates motor strain).
- The vacuum stops working after just a few seconds of use (float valve issue or motor failure).
- You cannot find replacement filters or attachments for your model.
- The tank has visible cracks or rust spots.
Features to Look For in an Upgrade
Choose a model with at least 5 peak horsepower for strong suction. Look for a drain valve for easy disposal of liquids. A longer hose (8 feet or more) gives you better reach without moving the machine constantly. Also, consider a model with a cartridge filter that does not require a bag for dry pickups.
Frequently Asked Questions
Can I use a wet/dry vacuum to clean hardwood floors every day?
You can use it weekly or after spills, but daily use is not recommended. The suction and physical contact can wear down the finish over time. Stick to dust mopping for daily maintenance and use the wet-dry vacuum for deeper cleaning every two weeks.
Do I need to use a special cleaning solution in my wet/dry vacuum?
For most floor cleaning, plain warm water works well. If you need to remove grease or sticky residue, add a small amount of a mild floor cleaner designed for your floor type. Avoid harsh detergents that can create excessive foam and damage the vacuum motor.
Why does my wet/dry vacuum smell bad after cleaning?
The most common cause is leftover moisture in the tank or foam filter. After each use, empty the tank, rinse it, and dry it completely. Wash the foam filter and let it air dry before storing. If the smell persists, leave the tank open in a sunny spot for a few hours.
Can I vacuum up paint or other liquids with a wet/dry vacuum?
Yes, you can vacuum latex paint as long as it is not fully dried. For oil-based paints, check the manufacturer’s instructions because some solvents can damage the tank. Always rinse the tank immediately after collecting paint to prevent residue from hardening.
How often should I replace the filters on my wet/dry vacuum?
Replace the paper cartridge filter every three to six months, depending on usage. Foam filters can last up to a year if you wash them regularly. Replace any filter that shows visible tears, holes, or heavy staining that does not wash out.
Is it safe to vacuum ash or fine dust from a fireplace?
No, standard wet/dry vacuums are not designed for fine ash or ultra-fine dust. The particles can pass through the filter and damage the motor. Use a vacuum specifically rated for ash or fine particulate, or attach a HEPA filter to your unit before vacuuming ash.
Can I leave the wet-dry vacuum plugged in all the time?
Leaving it plugged in is generally safe if the vacuum has a dedicated on/off switch and you store it in a dry area. However, unplugging it after use reduces the risk of accidental activation and protects the power cord from damage.



Leave a Reply