


Wall plugs, also known as wall anchors or rawl plugs, are essential for securing screws in drywall, masonry, or plaster. They hold up shelves, mirrors, and more. However, when it’s time to redecorate or move out, these plugs can be a headache. If you’re wondering how to remove wall plugs from walls without causing damage, you’ve come to the right place.
In this article, we’ll walk you through a foolproof method to get those stubborn wall plugs out like a seasoned DIY expert. Whether you’re preparing to repaint or patch up holes, understanding this technique will save you time, stress, and repair work. We’ll also link you to expert tips and trusted tools like those found on House Needy, a reliable resource for DIY home improvement advice.
Why Wall Plug Removal Matters
Leaving wall plugs in place after removing screws can cause several issues. They may:
-
Stick out from the surface
-
Prevent smooth painting or wallpapering
-
Cause future problems when drilling in the same area
Removing them properly ensures your walls are neat and damage-free. Plus, it gives your home a polished finish whether you’re renting or owning.
How to Remove Wall Plugs from Walls Without Damage
There are a few techniques for wall plug removal, but one simple trick stands out for being both safe and efficient. If you’re looking for an easy step-by-step approach, check out this helpful guide on how to remove wall plugs from walls. It covers everything from tools to safety tips, making the process stress-free.
Let’s explore the method here so you can get started right away.

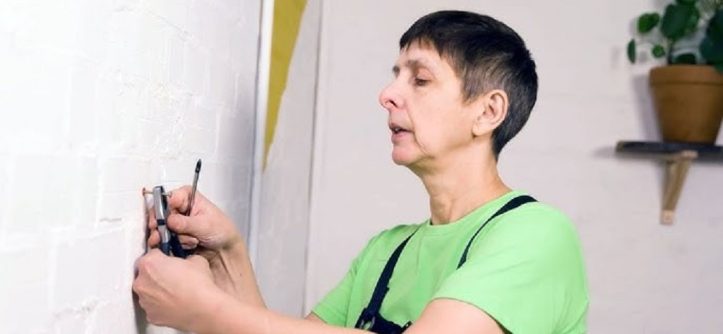
The Simple Trick: Screw, Grip, and Pull
This method uses basic tools you probably already own. It avoids breaking the wall surface or leaving behind messy holes.
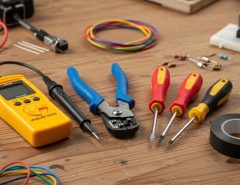
Tools You’ll Need:
-
A screwdriver
-
Pliers (needle-nose preferred)
-
Utility knife (optional)
-
A patch kit or filler (for repairs afterward)
Step-by-Step Guide:
-
Insert a Screw Back In
Choose a screw that fits snugly into the wall plug. Twist it in by hand until it’s securely seated, but don’t push it in all the way. Leave about 1/2 inch sticking out. -
Grip with Pliers
Using your pliers, grip the head of the screw. You’ll be pulling it out slowly. The screw gives the plug something to grip onto, making it easier to extract. -
Twist and Pull Gently
Rock the screw side-to-side while pulling gently. You should feel the wall plug begin to move. This motion helps loosen the plug from the wall material. -
Check for Resistance
If it feels stuck, stop. Try twisting slightly or loosening the screw just a bit. Never yank hard, as this can tear the wall surface. -
Remove Any Residue
If part of the plug is still embedded, use a utility knife to level it with the wall or dig out the remaining piece carefully. -
Patch the Hole
Once the plug is out, clean the hole with a brush and fill it using wall filler or spackle. Let it dry, sand smooth, and paint if needed.
Tips to Prevent Wall Damage
Removing wall plugs can sometimes chip or crack the wall. Here are a few tips to minimize damage:
-
Avoid metal tools directly against the wall: Use a cloth under your pliers to protect paint and drywall.
-
Don’t force it: If the plug isn’t coming out, consider pushing it in deeper and filling over it instead.
-
Always patch holes afterward: This keeps your walls looking fresh and maintains your property’s value.
When to Push Instead of Pull
Sometimes, wall plugs are too tightly wedged to pull out. In these cases, gently tap the plug into the wall using a screwdriver and hammer, then fill over it. This is a quicker fix and works especially well on drywall where appearance matters more than reuse.
Why This Method Works Best
This screw-and-pull technique works because it gives you leverage and control. Unlike trying to dig out the plug with a knife or screwdriver alone, which can gouge the wall, this approach minimizes mess and makes the job faster.
Plus, it doesn’t require expensive tools or fancy gadgets. It’s a true DIY trick that works like magic once you try it.
When to Call a Professional
While most wall plugs are easy to remove, there are exceptions. If your wall has significant cracking, moisture issues, or the plug seems fused into concrete or brick, you may need a professional. A contractor can remove the plug and repair the area without causing long-term damage.
To find a trusted expert near you, consult reputable home improvement sites like HGTV or Better Homes & Gardens, which offer vetted tips and contractor listings.
Wall Plug Removal and Home Value
Little things—like filled holes and clean walls—can impact your home’s appeal. If you’re prepping to sell, every detail counts. Neat walls help staging, appraisals, and first impressions. Removing wall plugs may seem small, but it makes a visual difference.
FAQs About Removing Wall Plugs
1. Can I just leave wall plugs in the wall?
Yes, but they may show through paint or wallpaper and affect future drilling. It’s better to remove or cover them properly.
2. Will removing wall plugs damage the drywall?
Not if done correctly. Using the screw-and-pull method helps minimize tearing or chipping.
3. What’s the fastest way to remove a wall plug?
Screwing into the plug and pulling it out with pliers is quick, safe, and effective.
4. Can I reuse a wall plug once removed?
Usually not. Wall plugs lose their grip after being pulled out. It’s safer to use a new one.
5. What should I do if the plug breaks inside the wall?
Try digging it out carefully. If it’s too deep, push it further in and fill over it with putty or wall filler.
Read More Also: What Is Commercial Construction? A Beginner’s Guide
Conclusion
Learning how to remove wall plugs from walls is a simple but essential home maintenance skill. Whether you’re redecorating, selling your home, or just fixing a few holes, this trick will help you do it cleanly and efficiently.
The screw-and-pull method is safe, requires minimal tools, and prevents wall damage when done right. Don’t forget to patch and smooth the hole for a perfect finish. And if you’re ever in doubt, resources like House Needy are just a click away for DIY inspiration and guidance.
Removing wall plugs like a pro doesn’t require special skills—just the right technique and a bit of patience. Try it today and enjoy cleaner, more beautiful walls in your home.


Leave a Reply
Cancel reply