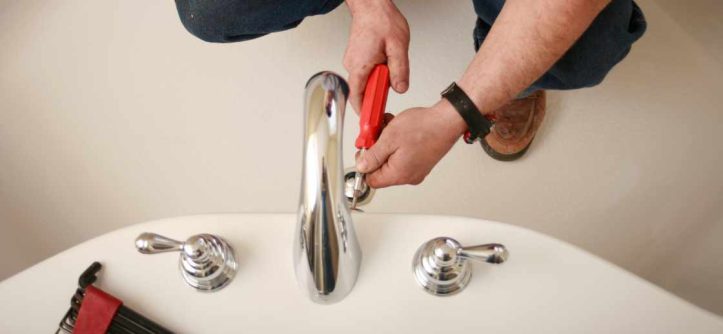
A leaking bathtub faucet is not just an annoyance; it can also lead to water wastage and potential damage to your bathroom. However, fixing it doesn’t always require calling a plumber. With some basic tools and a little know-how, you can tackle this common household issue yourself. In this guide, we’ll walk you through the steps to fix a leaking bathtub faucet.
A Step-by-Step Guide on How to Fix a Leaking Bathtub Faucet
Step 1: Gather the Necessary Tools
Before you begin, gather the tools you’ll need. These typically include an adjustable wrench, screwdriver (Phillips or flathead depending on your faucet), replacement washers or O-rings, and plumber’s tape. Having a flashlight handy may also be useful for better visibility.
Step 2: Turn Off the Water Supply
Locate the water shut-off valve for your bathtub and turn it off. This valve is usually located either near the bathtub itself or in the basement or utility room. Turning off the water supply ensures that you can work on the faucet without any water gushing out.
Step 3: Remove the Faucet Handle
Using a screwdriver, carefully remove the screw that holds the faucet handle in place. Once the screw is removed, gently pull the handle off the stem of the faucet. You may need to wiggle it a bit to loosen it.
Step 4: Inspect the Components
Once the handle is removed, you’ll see the stem and other components of the faucet. Inspect them for any signs of damage or wear, such as corrosion or mineral deposits. These could be causing the leak.
Step 5: Replace Washers or O-Rings
If the washers or O-rings appear worn or damaged, they may need to be replaced. Use your adjustable wrench to loosen the packing nut that holds them in place. Once the nut is removed, take out the old washers or O-rings and replace them with new ones of the same size. Make sure to apply plumber’s tape to the threads of the stem before reinstalling the packing nut.
Step 6: Reassemble the Faucet
Once you’ve replaced any damaged components, reassemble the faucet in the reverse order of how you took it apart. Slide the handle back onto the stem and secure it with the screw. Tighten the screw firmly, but be careful not to over-tighten it.
Step 7: Turn On the Water Supply
After reassembling the faucet, turn the water supply back on and test the faucet to see if the leak has been fixed. If you still notice a leak, double-check that all components are properly installed and tighten any loose fittings.
FAQs
Why is my bathtub faucet leaking?
A leaking bathtub faucet can be caused by various factors, including worn-out washers or O-rings, a faulty cartridge, mineral buildup, or loose connections. Over time, the constant use of the faucet can lead to wear and tear of its components, resulting in leaks. Identifying the specific cause of the leak is crucial for effective repair.
Can I fix a leaking bathtub faucet myself, or do I need to hire a plumber?
In many cases, you can fix a leaking bathtub faucet yourself without needing to hire a plumber. The process typically involves turning off the water supply, disassembling the faucet, inspecting the components for damage, and replacing any worn-out parts such as washers or O-rings. With some basic tools and DIY skills, you can successfully repair most bathtub faucet leaks. However, if you’re unsure about the repair process or encounter difficulties, it’s wise to seek professional assistance to avoid causing further damage.
How long does it take to fix a leaking bathtub faucet?
The time it takes to fix a leaking bathtub faucet depends on various factors, including the severity of the leak and your familiarity with plumbing repairs. For minor leaks caused by worn-out washers or O-rings, the repair process can typically be completed within an hour or two. However, if the leak is more complex or requires replacing additional components such as the cartridge or valve stem, it may take longer. It’s essential to allocate enough time for the repair and work carefully to ensure the problem is adequately resolved.
Final Thought
Fixing a leaking bathtub faucet is a manageable task that you can tackle on your own with the right tools and a little patience. By following these step-by-step instructions, you can save money on plumber fees and prevent further water wastage in your home. If you encounter any difficulties or the leak persists despite your efforts, don’t hesitate to seek professional assistance.
Tags: Gather the Necessary Tools


Leave a Reply