
What Is a Multimeter and Why Do You Need One?
A multimeter is one of the most useful beginner electrical tools you can own. It is a handheld device that measures electricity in several ways. You can use it to test voltage, resistance, and current. Electricians rely on it daily. However, homeowners and hobbyists find it just as valuable.
Whether you want to check a dead battery, troubleshoot a faulty outlet, or test a wire, a multimeter gives you the answers quickly. It removes the guesswork from electrical work. Therefore, learning how to use one is a smart investment of your time.
This guide walks you through everything you need to know. You will learn what the parts do, how to stay safe, and how to run common tests. By the end, you will feel confident picking up this tool and putting it to work.
Understanding the Parts of a Multimeter
Before you take any measurements, you need to know what you are looking at. A standard multimeter has three main parts.
The first is the display screen. This shows your reading in numbers. Most modern multimeters have a digital display, which is easy to read and accurate.
The second is the dial, also called the selector switch. You turn this to choose what you want to measure. Common settings include voltage (V), resistance (Ω), and current (A). Some dials also have a diode test and a continuity setting.
The third part is the probe ports. These are the small holes where you plug in your test leads. Most multimeters have three ports. The COM port is always used and connects the black probe. The port labeled VΩmA handles voltage and resistance. A separate port, often labeled 10A, is for measuring high current.
Additionally, your kit comes with two probes. The red probe is positive. The black probe is negative. Always plug them into the correct ports before testing.
Staying Safe Before You Start
Safety must come first whenever you work with electricity. Even a basic test can be dangerous if you skip the safety steps.
Always inspect your probes before use. Look for cracks, bare wires, or damaged tips. Do not use probes that look worn or broken. Additionally, check the multimeter itself for any physical damage.
Never touch the metal tips of the probes while a circuit is live. Hold only the insulated rubber handles. Keep one hand in your pocket or behind your back when testing high-voltage circuits. This reduces the risk of current passing through your chest.
Make sure you use the correct voltage range. Most modern digital multimeters have an auto-range feature, which selects the right range for you. However, if yours does not, always start with the highest range and work your way down.
Finally, read the manual that comes with your device. Each multimeter has a maximum voltage rating. Do not exceed it.
How to Test DC Voltage (Batteries and Car Systems)
DC voltage testing is one of the most common uses for a multimeter. Batteries, cars, and most electronics run on direct current, or DC.
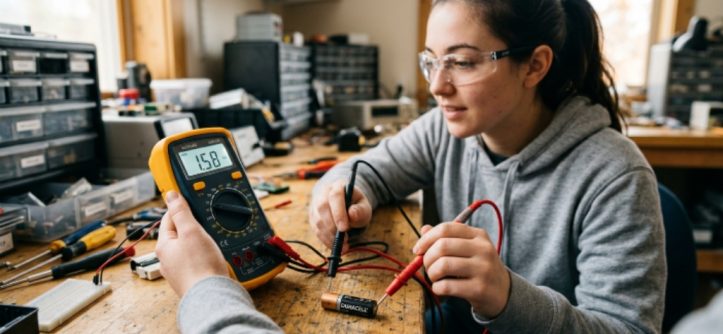
Start by turning the dial to the DC voltage setting. It is usually labeled with a V and a straight line above a dashed line. If your multimeter is not auto-ranging, select a range above the expected voltage. For a standard AA battery, choose a range above 1.5 volts.
Next, plug the black probe into the COM port and the red probe into the VΩmA port. Touch the black probe to the negative terminal and the red probe to the positive terminal. Read the number on the display.
A fully charged AA battery reads around 1.5 volts. A car battery in good health reads around 12.6 volts. Therefore, if your reading is significantly lower, the battery may need charging or replacement.
This is a core part of the voltage testing steps every beginner should practice. It is simple, safe, and gives you immediate, useful information.
How to Test AC Voltage (Wall Outlets and Home Wiring)
AC voltage is what powers your home outlets and appliances. Testing it requires a bit more caution, but the process is straightforward.
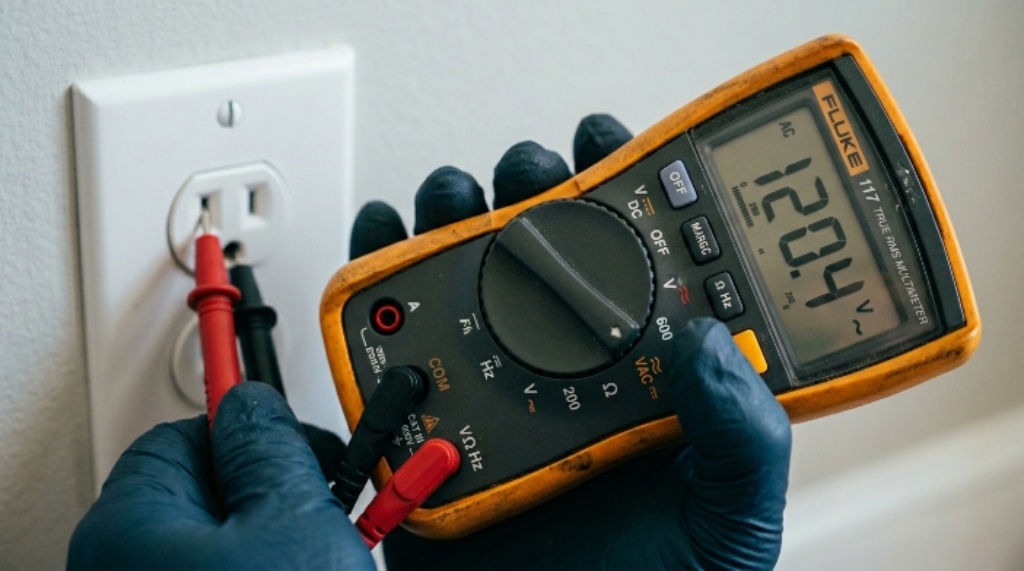
Turn the dial to the AC voltage setting. It is usually labeled with a V and a wavy line. Select a range above 120 volts if you are in the United States, or above 230 volts if you are in Europe.
Insert the black probe into the COM port and the red probe into the VΩmA port. Carefully insert the probe tips into the outlet slots. The display will show the voltage. A healthy US outlet should read between 110 and 120 volts.
Do not touch the metal tips during this test. Additionally, make sure your hands are dry before testing any wall outlet. If the reading is far outside the normal range, contact a licensed electrician. Do not attempt repairs yourself unless you are trained to do so.
How to Test Resistance
Resistance testing tells you how much a component opposes the flow of electricity. It is measured in ohms (Ω). This test helps you check if a resistor, fuse, or wire is working properly.
Turn the dial to the resistance setting, marked with the Ω symbol. Make sure the circuit or component is completely powered off and disconnected from any power source before testing. This step is critical. Testing resistance on a live circuit will give wrong readings and may damage the meter.
Touch the probes to both ends of the component. The display shows the resistance in ohms. A reading close to zero means very little resistance, which is good for a wire or fuse. A reading of OL or 1 on the display means the resistance is too high to measure, which often indicates a broken component.
How to Test Continuity
Continuity testing checks whether electricity can flow between two points. It is one of the most practical features on a multimeter. Use it to test switches, fuses, and cables.
Set the dial to the continuity setting. It usually looks like a sound wave or a diode symbol. When you touch both probes together, the multimeter should beep. This confirms the setting is working.
Now touch the probes to each end of the item you are testing. If the meter beeps, the circuit is complete and current can flow. If it stays silent, there is a break somewhere in the path.
This test is especially useful for checking extension cords and finding broken wires inside walls or appliances. Additionally, it helps you verify that a fuse has not blown before replacing it.
Practicing Multimeter Basics Safely at Home
The best way to build confidence is through practice. Start with low-stakes items like batteries and light bulb sockets. These let you get comfortable with the probes and the dial without any real danger.
Multimeter basics are easy to master once you run a few tests on familiar objects. Try testing different batteries around your home. Compare fresh ones with old ones. Notice how the voltage drops as a battery loses charge.
You can also use continuity mode to test a light switch. Turn it off and check continuity. Then turn it on and check again. You will see and hear the difference clearly. This kind of hands-on learning builds real skill fast.
Conclusion
A multimeter is an essential tool for anyone who wants to understand and work with electricity safely. You have learned what the parts are, how to stay safe, and how to run four key tests: DC voltage, AC voltage, resistance, and continuity.
The voltage testing steps covered in this guide give you a solid foundation. You now understand how to read the display, choose the right setting, and connect the probes correctly. Additionally, you know how to stay safe at each stage of the process.
These multimeter basics will serve you for years. Whether you are troubleshooting a dead outlet or checking a car battery, you now have the knowledge to do it correctly. Keep practicing, stay cautious, and your skills will only grow from here.
Frequently Asked Questions
What is the best multimeter for a beginner?
A digital auto-ranging multimeter is the best choice for beginners. It automatically selects the right measurement range, which reduces errors. Popular entry-level brands include Fluke, Klein Tools, and AstroAI.
Can a multimeter measure both AC and DC voltage?
Yes. Most multimeters can measure both. You simply turn the dial to the correct setting. AC is for household outlets, while DC is for batteries and car systems.
Is it safe to test a live outlet with a multimeter?
It is safe if you follow the correct steps. Use insulated probes in good condition, keep your hands dry, and never touch the metal probe tips during the test. Always use a multimeter rated for the voltage you are testing.
Why does my multimeter show OL on the display?
OL means “overload.” It means the reading is higher than the selected range can handle. If your multimeter is not auto-ranging, switch to a higher range. If it still shows OL during a resistance test, the component may be broken.
Do I need to turn off the power before testing resistance?
Yes, absolutely. Always disconnect the component or circuit from its power source before testing resistance or continuity. Testing on a live circuit gives inaccurate results and can damage your multimeter.
Related Topics:
How to Decorate My Home for Christmas: Practical Room-by-Room Guide
How to Replace a Front Door Without Replacing the Frame


Leave a Reply