
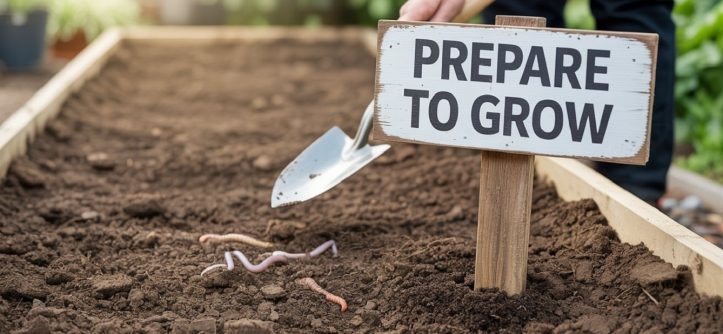
Have you ever envisioned a vibrant garden where you currently have a sea of green grass? Perhaps you dream of a bountiful vegetable patch, a serene flower bed, or a functional outdoor living space. The journey from a simple lawn to a flourishing garden is incredibly rewarding, but it all starts with one crucial step: removing the existing grass.
This task can seem daunting. The thick mat of turf, the stubborn roots, the fear of it growing back—it’s enough to make anyone feel overwhelmed. But what if we told you there are multiple, effective, and even eco-friendly ways to get the job done? This comprehensive guide will walk you through every method, helping you choose the best approach for your specific needs, budget, and timeline. We’ll turn that intimidating patch of green into the blank canvas for your gardening masterpiece.
Why You Can’t Just “Plant on Top”
Before we dive into the “how,” let’s address the “why.” You might be tempted to simply lay down a layer of soil and start planting. This is a common mistake and one that will lead to more work and frustration later on. Grass is an incredibly resilient plant. Its dense root system competes aggressively for water and nutrients, and any blades of grass left behind will quickly re-sprout, infiltrating your new garden beds and choking out your young plants. Removing the grass completely is a foundational step that ensures the long-term health and success of your new garden.
Method 1: The No-Dig, Mulching Approach (Lasagna Gardening)
This is one of the most popular and environmentally conscious methods for transforming a lawn into a garden. It’s also known as “lasagna gardening” because you build up layers of organic material, much like a lasagna. This method is excellent for those who want to avoid back-breaking labor and enrich their soil at the same time.
- How it Works: You suffocate the grass by blocking out sunlight, while the layered organic materials decompose, creating a nutrient-rich, fertile soil bed.
- Best for: New garden beds, raised garden beds, and gardeners with a patient timeline (it can take 2-4 months for the materials to fully break down).
- Materials Needed: Cardboard (non-glossy, tape-free), newspapers, compost, mulch (wood chips, straw), grass clippings, shredded leaves.
Step-by-Step Process:
- Mow the Grass: Start by mowing your existing lawn as low as possible. This reduces the amount of material the cardboard needs to smother.
- Lay Down Cardboard: Thoroughly wet the area you want to convert. Then, lay a single layer of flattened, overlapping cardboard boxes directly on top of the grass. Overlap the edges by at least 6-8 inches to prevent light from getting through the seams.
- Add Organic Layers: Now, start building your “lasagna.” Alternate between “brown” and “green” layers.
- Brown Layers: Carbon-rich materials like shredded cardboard, newspaper, wood chips, and dry leaves.
- Green Layers: Nitrogen-rich materials like kitchen scraps, grass clippings, and fresh plant trimmings.
- Top with Mulch: Finish with a generous 4-6 inch layer of wood chips or straw. This helps to retain moisture, suppress weeds, and looks tidy.
- Wait and Plant: Over the next few months, the materials will decompose. You can plant directly into this bed, though some gardeners prefer to wait until the grass and cardboard have fully broken down.
LSI Keywords: organic gardening, eco-friendly method, no-dig garden, sheet mulching, cardboard weed barrier.
Method 2: The Manual & Physical Approach (Sod Cutting)
For those who need to remove grass immediately and don’t mind a bit of a workout, manual removal is the way to go. This involves physically cutting and lifting the sod.
- How it Works: You use a specialized tool or a shovel to cut the grass and its roots into manageable sections, which are then physically removed.
- Best for: Small to medium-sized areas, quick results, and gardeners who prefer to start from scratch with clean soil.
- Tools Needed: A sharp, flat-bladed spade or shovel, a manual sod cutter, or a rototiller (for larger areas).
Step-by-Step Process:
- Water the Area: A day or two before you begin, water the area thoroughly. This softens the soil, making it easier to cut and lift the sod.
- Cut the Sod: Using your spade or sod cutter, slice the grass into long, narrow strips. A sod cutter can be a lifesaver for this task. You want to go deep enough to get the entire root system, typically 2-3 inches.
- Lift and Roll: Roll the strips of sod like a carpet. This makes them easier to handle and move.
- Dispose or Re-use: You now have a pile of sod. You can dispose of it (check local regulations), compost it (it’s excellent compost material), or use it to patch bare spots in other areas of your lawn.
LSI Keywords: manual labor, physical removal, sod cutter rental, digging up turf, preparing garden soil.
Method 3: The Solarization Method
This method harnesses the power of the sun to kill the grass and weed seeds. It’s an effective and chemical-free approach, but it requires patience and a good amount of consistent sunshine.
- How it Works: A clear plastic tarp traps solar radiation, heating the soil to temperatures high enough to kill grass, weeds, and pathogens.
- Best for: Warm, sunny climates, large areas, and gardeners who can wait a few weeks or months.
- Materials Needed: A large, clear plastic sheet (4-6 mil thick). Black plastic is not as effective as it absorbs heat rather than allowing it to penetrate the soil.
Step-by-Step Process:

- Prepare the Area: Mow the grass as low as possible and rake the area to remove any debris.
- Water the Soil: Water the soil deeply. Moist soil conducts heat more efficiently than dry soil.
- Cover with Plastic: Spread the clear plastic sheet over the area, making sure it’s taut and flat against the ground.
- Anchor the Edges: Bury the edges of the plastic with soil or rocks to create a seal. This prevents heat from escaping and wind from dislodging the sheet.
- Wait: Leave the plastic in place for at least 4-6 weeks during the hottest part of the year. The hotter and sunnier the weather, the faster it will work.
- Remove and Plant: Once the grass and weeds are completely dead and brown, you can remove the plastic and get your garden ready for planting.
LSI Keywords: thermal weed control, chemical-free gardening, soil sterilization, sun method, plastic tarp.
Method 4: Chemical Control (Herbicide)
While not the most environmentally friendly option, chemical control is a fast and effective way to remove grass, especially stubborn varieties like Bermuda grass or St. Augustine grass.
- How it Works: You apply a non-selective herbicide, like glyphosate, to the grass, which is absorbed by the leaves and travels to the roots, killing the entire plant.
- Best for: Tough, invasive grasses, large areas, or when other methods are not practical. Use with extreme caution.
- Materials Needed: A non-selective herbicide (e.g., glyphosate-based product), a sprayer.
Step-by-Step Process:
- Choose the Right Product: Select a product that is labeled for killing grass and a wide range of weeds. Follow the instructions on the label carefully.
- Wait for the Right Conditions: Apply on a calm, non-windy day to prevent drift onto other plants. Wait until the grass is actively growing.
- Apply Evenly: Use a sprayer to apply the herbicide evenly across the entire area. Be careful not to spray on any nearby plants you want to keep.
- Wait for it to Die: It can take 7-14 days for the grass to completely die.
- Remove the Dead Turf: Once the grass is completely brown and dead, you can either till the soil to mix it in or physically remove the dead sod.
Important Note: Always read and follow the manufacturer’s instructions for any chemical product. Wear appropriate personal protective equipment. Consider the potential impact on local wildlife, pets, and the environment.
LSI Keywords: herbicide application, chemical grass killer, weed control, turf removal, glyphosate.
Post-Removal: The Next Steps for Your Garden
Once the grass is gone, your work isn’t over. The next steps are crucial for ensuring a healthy and productive garden:
- Amend the Soil: Grass often leaves behind compacted soil. Add organic matter like compost, well-rotted manure, or peat moss to improve soil structure, drainage, and fertility.
- Loosen the Soil: Use a garden fork or tiller to break up the compacted soil. This allows for better root growth and nutrient absorption.
- Finalize Your Design: Now that you have a blank slate, lay out your garden beds, pathways, and any other features you’ve planned.
Read More Also: How Long Does Copper Plumbing Last?
FAQs: Answering Your Top Questions
Q: How do I remove grass without a tiller?
A: The no-dig method (Lasagna Gardening) and the solarization method are both highly effective ways to remove grass without a tiller. For smaller areas, a flat-bladed shovel or a manual sod cutter will also work perfectly.
Q: What is the fastest way to get rid of grass for a new garden?
A: The fastest method is typically chemical control or physical removal with a sod cutter. Both will give you a ready-to-plant space in a matter of days or weeks.
Q: Will cardboard kill grass permanently?
A: Yes, when used correctly, cardboard will kill grass. It works by blocking out all sunlight, which starves the grass and causes it to die. It also decomposes over time, enriching the soil.
Q: What are the benefits of removing grass for a garden?
A: Removing grass allows you to create a dedicated planting area free from competition for resources, improves soil health, and gives you complete control over your garden’s design and plant selection.
Read More Also: What To Do With Hellebores In Summer
Conclusion: Your Garden Journey Begins Now
Removing grass for a garden is the critical first step toward creating your dream outdoor space. Whether you choose the patient, enriching no-dig method, the quick-results of a sod cutter, the power of the sun, or a chemical approach, the key is to fully commit to the process. By taking the time to properly clear the area, you are setting the stage for a thriving, beautiful, and productive garden.

Leave a Reply